Showing posts with label Daring Baker Challenge. Show all posts

Sunday, May 27, 2012

Challah, Daring Bakers Challenge; May 2012

(1 loaf)


May’s Daring Bakers’ Challenge was pretty twisted – Ruth from The Crafts of Mommyhood challenged us to make challah! Using recipes from all over, and tips from “A Taste of Challah,” by Tamar Ansh, she encouraged us to bake beautifully braided breads.

I made half the recipe and my loaf turned out really well. I had a bit of trouble with the 6 strand braid, but I imagine if make another loaf, I will get the hang of it.

Below I have listed the quantities for half a loaf.

Challah (Honey White)

(adapted from Tammy’s Recipes)

Ingredients
3/4 cup warm water, separated
1 tsp  sugar
1 tbsp dry active yeast
2 tbsp honey
2 tbsp light colored vegetable oil, or olive oil if you prefer

2 large eggs
3/4 tsp salt
2 1/2 cups all-purpose (plain) flour, plus more as needed (up to 4-4 1/2 cups total)
1 egg beaten with 1 tsp. water


Directions:

1. In mixer bowl/large mixing bowl combine ½ cup warm water, 1 Tbsp. sugar and 2 Tbsp. yeast. Allow to proof approximately 5 minutes until foamy.
2. To the yeast mixture add the remaining water, honey, oil, eggs, salt and 2 1/2 cups of flour. Knead (by hand or with your mixer’s dough hook) until smooth, adding flour as needed. Knead for approximately 10 minutes.
3. Transfer dough to a clean, oiled bowl, turn to coat or add a bit more oil on top. Cover bowl with a kitchen/tea towel. Leave to rise in a warm place until doubled, about 1 ½ hours.


4. Punch down the dough and shape as desired.
5. Place loaf on parchment lined or greased baking sheet, cover with a towel, allow to rise 30 minutes.
6. Preheat oven to 325 degrees.
7. Brush loaf with egg wash. (Sprinkle with seeds or toppings here if wanted.)
8. Bake 30-40 minutes until done.
9. Cool on wire rack.

Sunday, February 26, 2012

Savory Cheese Popovers; Daring Bakers Challenge, February 2012


  (6 popovers)


The Daring Bakers’ February 2012 host was – Lis! Lisa stepped in last minute and challenged us to create a quick bread we could call our own. She supplied us with a base recipe and shared some recipes she loves from various websites and encouraged us to build upon them and create new flavor profiles.


My mum used to make popovers fairly frequently. She liked to experiment and made some interesting tall ones, using empty tin cans. I've never made them, so now was the perfect time for me to give these a try. 

My popovers didn't rise as much as my mum's and the holes were more evenly distributed. Hers used to have one large hole in the middle, making any leftovers perfect for stuffing with tuna or egg salad the next day.


Savory Cheese Popovers

Basic Popovers recipe adapted from All Recipes
2 tbsp *canola oil
2 eggs
1 cup all-purpose flour
1 cup milk
1/8-1/4 tsp salt, to taste
freshly ground black pepper, to taste
1/2 cup shredded sharp cheddar cheese
1 tbsp green onion, sliced or jalapeno, finely diced


Preheat oven to 425°F.

Divide the oil evenly between the cups of a standard 6 cup muffin tin; 1 tsp per cup. Place muffin tin into oven to heat; 5-10 minutes. It doesn't matter if the maximum temperature has been reached yet, you just want to get the cups and oil smoking hot.(My mum used to say heating the tins first made the popovers rise more.)


In a bowl whisk the eggs, then add the flour, milk, salt and pepper and whisk only until the mixture is evenly combined and smooth. Whisk in the cheese and onion or **jalapeno.

**I served my popovers with chili and thought later that jalapeno might have been more interesting than green onion.

Carefully remove the hot muffin tin from the oven and ladle enough batter to bring it up to about 1/4 inch from the top.


Return to the oven and bake for about 25-35 minutes or until the popovers are a nice even brown. My baking time is shorter because I use a convection oven. The popovers will begin to collapse once you remove them from the oven. If you prefer them a bit dryer (and stiffer), then turn off the heat and leave them in the oven an additional 5 minutes or so. I remember my mum doing this.

*Despite the amount of oil I used, two popovers still managed to stick to the tin and I had to pry them out with chopsticks.

Monday, December 26, 2011

Daring Baker Challenge, December 2011; Sour Dough Starter


Our Daring Bakers Host for December 2011 was Jessica of My Recipe Project and she showed us how fun it is to create Sour Dough bread in our own kitchens! She provided us with Sour Dough recipes from Bread Matters by AndrewWhitley as well as delicious recipes to use our Sour Dough bread in from Tonia George’s Things on Toast and Canteen’s Great British Food!
I was thrilled with this challenge. I lost my previous 6-year old starter when we had a four day power outage during extremely high temperatures here in Dallas. This gave me the opportunity to get another one going. Mine took nine days to come to life, but the wait was worth it. The aroma is amazing and it has a wonderful tang which I imagine will develop nicely as time goes on.
I decided to make the French Country Bread, which I've copied out below.


Thanks for this challenge!


Tuesday, September 27, 2011

Daring Baker Challenge, September 2011; Croissants

The Daring Bakers go retro this month! Thanks to one of our very talented non-blogging members, Sarah, the Daring Bakers were challenged to make Croissants using a recipe from the Queen of French Cooking, none other than Julia Child!


Sunday, March 27, 2011

Daring Baker Challenge, March 2011; Mets la main à la pâte! Yeasted Meringue Coffee Cake


The March 2011 Daring Baker’s Challenge was hosted by Ria of Ria’s Collection and Jamie of Life’s a Feast. Ria and Jamie challenged The Daring Bakers to bake a yeasted Meringue Coffee Cake.

Never having come across a coffee cake like this with meringue, I was quite curious to see the result. I kept my filling very simple. I sprinkled a tiny bit of cardamon over the vanilla flavoured meringue and then added dark chocolate chunks over that.

This cake was amazing.. as someone had mentioned  early on in the Daring Baker's forum.. it was difficult to stop eating it once you got started. :)

Saturday, February 26, 2011

Daring Baker Challenge, February 2011; Panna Cotta and Florentines


The February 2011 Daring Bakers’ challenge was hosted by Mallory from A Sofa in the Kitchen. She chose to challenge everyone to make Panna Cotta from a Giada De Laurentiis recipe and Nestle Florentine Cookies.

I have never made or had Panna Cotta. I loved the simplicity of this recipe; it's the perfect dessert for a dinner party. The only thing I changed was the milk/cream ratio which I inverted to 1 cup cream to 3 cups milk. The result was still seemed very rich to me. I will definitely make this again!

Wednesday, January 26, 2011

The Daring Baker Challenge, January 2011, Biscuit Joconde Imprime/Entremet


The January 2011 Daring Bakers’ challenge was hosted by Astheroshe of the blog accro. She chose to challenge everyone to make a Biscuit Joconde Imprime to wrap around an Entremets dessert.
 

After giving this some thought, I decided to fill the sponge with a raspberry bavarian creme.

It ended up taking less time than I expected. My final sponge had larger holes than I liked. In part it was how I looped the chocolate portion, but the sponge itself seemed more airy as well. I'm not sure if that was because of how I beat the egg whites or if it was the nut/flour/egg proportions. In any case, I would make this again with perhaps a few adjustments.


Joconde Sponge

YIELD: Two ½ size sheet pans or a 13” x 18” (33 x 46 cm) jelly roll pan
Ingredients:
¾ cup/ 180 ml/ 3oz/ 85g almond flour/meal - *You can also use hazelnut flour, just omit the butter
½ cup plus 2 tablespoons/ 150 ml/ 2⅔ oz/ 75g confectioners' (icing) sugar
¼ cup/ 60 ml/ 1 oz/ 25g cake flour *See note below
3 large eggs - about 5⅓ oz/ 150g
3 large egg whites - about 3 oz/ 90g
2½ teaspoons/ 12½ ml/ ⅓ oz/ 10g white granulated sugar or superfine (caster) sugar
2 tablespoons/ 30 ml/ 1oz / 30g unsalted butter, melted

*Note: How to make cake flour: http://www.joythebaker.com/blog/2009/09/how-to-make-cake-flour/
Directions:
  1. In a clean mixing bowl whip the egg whites and white granulated sugar to firm, glossy peeks. Reserve in a separate clean bowl to use later.
  2. Sift almond flour, confectioner’s sugar, cake flour. (This can be done into your dirty egg white bowl)
  3. On medium speed, add the eggs a little at a time. Mix well after each addition. Mix until smooth and light. (If using a stand mixer use blade attachment. If hand held a whisk attachment is fine, or by hand. )
  4. Fold in one third reserved whipped egg whites to almond mixture to lighten the batter. Fold in remaining whipped egg whites. Do not over mix.
  5. Fold in melted butter.
  6. Reserve batter to be used later.

Patterned Joconde-Décor Paste

YIELD: Two ½ size sheet pans or a 13” x 18” (33 x 46 cm) jelly roll pan

Ingredients
14 tablespoons/ 210ml/ 7oz/ 200g unsalted butter, softened
1½ cups plus1½ tablespoons/ 385ml/ 7oz/ 200g Confectioners' (icing) sugar
7 large egg whites - about 7 oz / 200g
1¾ cup/ 420ml/ 7¾ oz/ 220g cake flour
Food coloring gel, paste or liquid

COCOA Décor Paste Variation: Reduce cake flour to 6 oz / 170g. Add 2 oz/ 60 g cocoa powder. Sift the flour and cocoa powder together before adding to creamed mixture.

Directions:

  1. Cream butter and sugar until light and fluffy (use stand mixer with blade, hand held mixer, or by hand)
  2. Gradually add egg whites. Beat continuously.
  3. Fold in sifted flour.
  4. Tint batter with coloring to desired color, if not making cocoa variation.
Preparing the Joconde- How to make the pattern:
  1. Spread a thin even layer of décor paste approximately 1/4 inch (5 millimeter) thick onto silicone baking mat with a spatula, or flat knife. Place mat on an upside down baking sheet. The upside down sheet makes spreading easier with no lip from the pan.
  2. Pattern the décor paste – Here is where you can be creative. Make horizontal /vertical lines (you can use a knife, spatula, cake/pastry comb). Squiggles with your fingers, zig zags, wood grains. Be creative whatever you have at home to make a design can be used. OR use a piping bag. Pipe letters, or polka dots, or a piped design. If you do not have a piping bag. Fill a ziplock bag and snip off corner for a homemade version of one.
  3. Slide the baking sheet with paste into the freezer. Freeze hard. Approx 15 minutes.
  4. Remove from freezer. Quickly pour the Joconde batter over the design. Spread evenly to completely cover the pattern of the Décor paste.
  5. Bake at 475ºF /250ºC until the joconde bounces back when slightly pressed, approx. 15 minutes. You can bake it as is on the upside down pan. Yes, it is a very quick bake, so watch carefully.
  6. Cool. Do not leave too long, or you will have difficulty removing it from mat.
  7. Flip cooled cake on to a powdered sugared parchment paper. Remove silpat. Cake should be right side up, and pattern showing! (The powdered sugar helps the cake from sticking when cutting.)

Preparing the MOLD for entremets:
You can use any type of mold. I would suggest:
  1. Start with a large piece of parchment paper laid on a very flat baking sheet. Then a large piece of cling wrap over the parchment paper. Place a spring form pan ring, with the base removed, over the cling wrap and pull the cling wrap tightly up on the outside of the mold. Line the inside of the ring with a curled piece of parchment paper overlapping top edge by ½ inch. CUT the parchment paper to the TOP OF THE MOLD. It will be easier to smooth the top of the cake.
  2. A biscuit cutter/ cookie cutter- using cling wrap pulled tightly as the base and the cling covering the outside of the mold, placed on a parchment lined very flat baking sheet. Line the inside with a curled piece of parchment paper overlapping.
  3. Cut PVC pipe from your local hardware store. Very cheap! These can be cut into any height you wish to make a mold. 2 to 3 inches is good. My store will cut them for me, ask an employee at your store. You can get several for matching individual desserts. Cling wrap and parchment line, as outlined above.
  4. Glass Trifle bowl. You will not have a free standing dessert, but you will have a nice pattern to see your joconde for this layered dessert.
Preparing the Jaconde for Molding:

Video: MUST WATCH THIS. This is a very good demo of the joconde and filling the entremets:
http://www.youtube.com/watch?v=ca4eLDok-4Q

  1. Trim the cake of any dark crispy edges. You should have a nice rectangle shape.
  2. Decide how thick you want your “Joconde wrapper”. Traditionally, it is ½ the height of your mold. This is done so more layers of the plated dessert can be shown. However, you can make it the full height.
  3. Once your height is measured, then you can cut the cake into equal strips, of height and length. (Use a very sharp paring knife and ruler.)
  4. Make sure your strips are cut cleanly and ends are cut perfectly straight. Press the cake strips inside of the mold, decorative side facing out. Once wrapped inside the mold, overlap your ends slightly. You want your Joconde to fit very tightly pressed up to the sides of the mold. Then gently push and press the ends to meet together to make a seamless cake. The cake is very flexible so you can push it into place. You can use more than one piece to “wrap “your mold, if one cut piece is not long enough.
  5. The mold is done, and ready to fill.
*Note: If not ready to use. Lay cake kept whole or already cut into strips, on a flat surface, wrap in parchment and several layers of cling wrap and freeze.
Entremet- Filling Options:
http://www.youtube.com/watch?v=0e1DsyDtcd0&feature=related
It is nice to have a completed dessert so you can unmold and see the Joconde working. Fill with anything you desire. Layers of different flavors and textures! However, it needs to be something cold that will not fall apart when unmolded.
Suggestions:
Mousses, pastry creams, Bavarian creams, cheesecakes, puddings, curds, jams, cookie bases, more cake (bake off the remaining sponge and cut to layer inside), nuts, Dacquoise, fresh fruit, chocolates, gelee.

Additional Information:
http://lesotlylaisse.over-blog.com/article-realiser-un-biscuit-joconde-i...
http://www.marthastewartweddings.com/recipe/joconde-cakes
http://www.marthastewartweddings.com/recipe/pate-a-cigarette-batter-choc...
http://ricettedafairyskull.myblog.it/archive/2010/05/29/biscuit-joconde-...
http://chocolateandzucchini.com/archives/2004/02/pierre_hermes_aztec_ent...
http://sum.ptuo.us/roller/ks/entry/entrement_project_at_nwcav
http://www.youtube.com/watch?v=ca4eLDok-4Q
http://www.youtube.com/watch?v=0e1DsyDtcd0&feature=related


Saturday, December 25, 2010

Daring Baker Challenge, Dec. 2010; Christmas Stollen


HAPPY HOLIDAYS!
The 2010 December Daring Bakers’ challenge was hosted by Penny of Sweet Sadie’s Baking. She chose to challenge Daring Bakers’ to make Stollen. She adapted a friend’s family recipe and combined it with information from friends, techniques from Peter Reinhart’s book.........and Martha Stewart’s demonstration.

I decided to make the traditional loaf shaped stollen and I filled mine with a piece of marzipan. I just couldn't imagine making one without that. I replaced half the cinnamon with cardamon and increased the amounts of raisins, dried sour cherries (in place of glacé cherries) and toasted slivered almonds to replace the mixed peel which I'm not entirely fond of. I do like homemade peel, but didn't have the time to make any this year.

This recipe was quite good compared to the many stollen I have sampled over the years.

Stollen Wreath

Makes one large wreath or two traditional shaped Stollen loaves. Serves 10-12 people

Ingredients

¼ cup (60ml) lukewarm water (110º F / 43º C)
2 packages (4 1/2 teaspoons) (22 ml) (14 grams) (1/2 oz) active dry yeast
1 cup (240 ml) milk
10 tablespoons (150 ml) (140 grams) unsalted butter (can use salted butter)
5½ cups (1320 ml) (27 ozs) (770 grams) all-purpose (plain) flour (Measure flour first - then sift- plus extra for dusting)
½ cup (120 ml) (115 gms) sugar
¾ teaspoon (3 ¾ ml) (4 ½ grams) salt (if using salted butter there is no need to alter this salt measurement)
1 teaspoon (5 ml) (6 grams) cinnamon
3 large eggs, lightly beaten
Grated zest of 1 lemon and 1 orange
2 teaspoons (10 ml) (very good) vanilla extract
1 teaspoon (5 ml) lemon extract or orange extract
¾ cup (180 ml) (4 ¾ ozs) (135 grams) mixed peel (link below to make your own)
1 cup (240 ml) (6 ozs) (170 gms) firmly packed raisins
3 tablespoons (45ml) rum
12 red glacé cherries (roughly chopped) for the color and the taste. (optional)
1 cup (240 ml) (3 ½ ozs) (100 grams) flaked almonds
Melted unsalted butter for coating the wreath
Confectioners’ (icing) (powdered) sugar for dusting wreath

Note: If you don’t want to use alcohol, double the lemon or orange extract or you could use the juice from the zested orange.

Directions:

Soak the raisins
In a small bowl, soak the raisins in the rum (or in the orange juice from the zested orange) and set aside. See Note under raisins.


To make the dough

Pour ¼ cup (60 ml) warm water into a small bowl, sprinkle with yeast and let stand 5 minutes. Stir to dissolve yeast completely.
In a small saucepan, combine 1 cup (240 ml) milk and 10 tablespoons (150 ml) butter over medium - low heat until butter is melted. Let stand until lukewarm, about 5 minutes.
Lightly beat eggs in a small bowl and add lemon and vanilla extracts.
In a large mixing bowl (4 qt) (4 liters) (or in the bowl of an electric mixer with paddle attachment), stir together the flour, sugar, salt, cinnamon, orange and lemon zests.
Then stir in (or mix on low speed with the paddle attachment) the yeast/water mixture, eggs and the lukewarm milk/butter mixture. This should take about 2 minutes. It should be a soft, but not sticky ball. When the dough comes together, cover the bowl with either plastic or a tea cloth and let rest for 10 minutes.
Add in the mixed peel, soaked fruit and almonds and mix with your hands or on low speed to incorporate. Here is where you can add the cherries if you would like. Be delicate with the cherries or all your dough will turn red!
Sprinkle flour on the counter, transfer the dough to the counter, and begin kneading (or mixing with the dough hook) to distribute the fruit evenly, adding additional flour if needed. The dough should be soft and satiny, tacky but not sticky. Knead for approximately 8 minutes (6 minutes by machine). The full six minutes of kneading is needed to distribute the dried fruit and other ingredients and to make the dough have a reasonable bread-dough consistency. You can tell when the dough is kneaded enough – a few raisins will start to fall off the dough onto the counter because at the beginning of the kneading process the dough is very sticky and the raisins will be held into the dough but when the dough is done it is tacky which isn't enough to bind the outside raisins onto the dough ball.
Lightly oil a large bowl and transfer the dough to the bowl, rolling around to coat it with the oil. Cover the bowl with plastic wrap.
Put it in the fridge overnight. The dough becomes very firm in the fridge (since the butter goes firm) but it does rise slowly… the raw dough can be kept in the refrigerator up to a week and then baked on the day you want.


I shaped mine into the traditional loaf with a strip of marzipan in the middle - this recipe makes 2 loaves.

Shaping the Dough and Baking the Wreath

1. Let the dough rest for 2 hours after taking out of the fridge in order to warm slightly.
2. Line a sheet pan with parchment paper.
3. Preheat oven to moderate 350°F/180°C/gas mark 4 with the oven rack on the middle shelf.
4. Punch dough down, roll into a rectangle about 16 x 24 inches (40 x 61 cms) and ¼ inch (6 mm) thick.

Starting with a long side, roll up tightly, forming a long, thin cylinder.

Transfer the cylinder roll to the sheet pan. Join the ends together, trying to overlap the layers to make the seam stronger and pinch with your fingers to make it stick, forming a large circle. You can form it around a bowl to keep the shape.

This was before I pinched it together
Using kitchen scissors, make cuts along outside of circle, in 2-inch (5 cm) intervals, cutting 2/3 of the way through the dough.

Twist each segment outward, forming a wreath shape. Mist the dough with spray oil and cover loosely with plastic wrap.

Proof for approximately 2 hours at room temperature, or until about 1½ times its original size.
Bake the stollen for 20 minutes, then rotate the pan 180 degrees for even baking and continue to bake for 20 to 30 minutes. The bread will bake to a dark mahogany color, should register 190°F/88°C in the center of the loaf, and should sound hollow when thumped on the bottom.
Transfer to a cooling rack and brush the top with melted butter while still hot.
Immediately tap a layer of powdered sugar over the top through a sieve or sifter.
Wait for 1 minute, then tap another layer over the first.
The bread should be coated generously with the powdered sugar.
Let cool at least an hour before serving. Coat the stollen in butter and icing sugar three times, since this many coatings helps keeps the stollen fresh - especially if you intend on sending it in the mail as Christmas presents!
When completely cool, store in a plastic bag. Or leave it out uncovered overnight to dry out slightly, German style.

The stollen tastes even better in a couple of days and it toasts superbly…. so delicious with butter and a cup of tea….mmmmm
Storage
The more rum and the more coatings of butter and sugar you use the longer it will store.
The following is for the recipe as written and uses the 45 mls of rum and two coatings of butter and icing sugar
1. Stollen freezes beautifully about 4 months
2. The baked stollen stores well for 2 weeks covered in foil and plastic wrap on the counter at room temperature and
3. One month in the refrigerator well covered with foil and plastic wrap.

Additional Information:

Here is a link to recipes to make your own candied citrus peel
http://www.harvestwizard.com/2006/12/candied_citron_recipe.html
http://video.about.com/candy/Make-Candied-Citrus-Peel.htm

http://userealbutter.com/2007/10/09/candied-orange-peels-recipe/

Kneading Bread
http://www.youtube.com/watch?v=dWj8oHMPFm0

Martha Stewart’s wreath
http://www.marthastewart.com/recipe/stollen-wreath-bread-with-mrs-kostyra

Tuesday, October 26, 2010

Daring Baker Challenge, Oct, 2010; Jam Filled Donuts

(about 2 dozen)


The October 2010 Daring Bakers challenge was hosted by Lori of Butter Me Up. Lori chose to challenge DBers to make doughnuts. She used several sources for her recipes including Alton Brown, Nancy Silverton, Kate Neumann and Epicurious.

I decided to make the yeast donut with a jam filling which is similar to a donut my mother used to make for us when we were children. I have never made them before and was very keen to give it a try. This month's challenge gave me that opportunity.

I adjusted Kate Neumann's recipe slightly by adding the jam before I fried them instead of afterwards (like my mother did). These donuts were amazing. I was very glad I only made half the recipe.

Adapted from Kate Neumann's Jelly Filled Bomboloni

Ingredients

1/2 cup plus 1 tablespoon lukewarm water

1 1/2 envelopes active dry yeast (3 1/4 teaspoons)

1 1/2 tablespoons honey

3 cups all-purpose flour, plus more for dusting

3 tablespoons milk

6 large egg yolks

1/3 cup granulated sugar, plus more for rolling

2 teaspoons kosher salt

3 tablespoons unsalted butter, softened

3/4 cup  preserves 

3 cups canola oil, for frying

Confectioners' Sugar, for dusting 


I wet the dough slightly before I placed the second layer over and this turned out to be completely unnecessary. The dough seemed more reluctant to stay sealed than the second half I made without wetting it first.


Directions

  1. In the bowl of a standing electric mixer, mix the water, yeast, honey and 1 cup plus 2 tablespoons of the flour. (Alternatively, whisk the ingredients by hand.) Cover with plastic wrap and let stand at room temperature until foamy, about 1 hour.
  2. Return the bowl to the mixer, fitted with a dough hook. Add the remaining 13/4 cups plus 2 tablespoons of flour, along with the milk, egg yolks, 1/3 cup of granulated sugar and the salt. Mix at low speed until blended, then add the butter and knead at medium speed until silky but sticky, about 5 minutes; the dough will not pull away from the side of the bowl. Using an oiled spatula, scrape the dough into an oiled bowl and cover with plastic wrap. Refrigerate overnight. The dough will not rise. 
  3. In a large saucepan, heat the canola oil to 360°. Line a rack with paper towels. Fill a shallow bowl with 1/2 inch of granulated sugar. On a lightly floured surface, roll out the dough a scant 1/4 inch thick. Using a 2-inch round biscuit cutter, stamp out 32 rounds; do not reroll the dough. Fry the rounds, 8 at a time, until they are browned, about 4 minutes. Be sure to keep the oil between 360° and 375°. Drain the bomboloni on paper towels, then roll them in the granulated sugar. Continue frying and rolling the remaining bomboloni.
  4. Fit a pastry bag with a plain donut tip (or a 1/4-inch tip) and fill with the preserves (you can also use a squeeze bottle). Poke the tip three-fourths of the way into the bomboloni and squeeze in the preserves, pulling the tip out slightly as you squeeze to fill them as much as possible. Dust the bomboloni with confectioners' sugar and serve warm.

Tuesday, July 27, 2010

Daring Baker Challenge, July 2010; Swiss Swirl Ice Cream Cake

(1x 1 1/2 quart sized cake)


The July 2010 Daring Bakers’ challenge was hosted by Sunita of Sunita’s world – life and food. Sunita challenged everyone to make an ice-cream filled Swiss roll that’s then used to make a bombe with hot fudge. Her recipe is based on an ice cream cake recipe from Taste of Home.

Mandatory

•You must make the Swiss rolls, a filling for them, two ice creams and a fudge sauce, from scratch.
•You must set the dessert in a bowl/pan etc in the order given in the recipe-Swiss roll, first ice-cream, the fudge topping and, finally, the second ice cream.

I liked this challenge a lot, and as you can see we were given quite a bit of freedom in regard to recipes. I used my own.

The chocolate fudge ended up as both a layer between the ice cream and frozen yogurt as well as the filling for my swiss roll. I had a bit of fun by colouring parts of the batter.

I revisited a dulce de leche ice cream I made a few years ago and loved, as well as a raspberry frozen yogurt.

This dessert was soooo goood! I will make it again. :) I'm not sure I will make it with a fudge sauce though, that really depends on the ice cream I use. I'd be inclined to try a vanilla sauce or something fruity in the future.


swiss roll
4 eggs
1/2 cup sugar
a few drops of food colouring (optional)
1 tsp vanilla extract
1/2 cup cake flour

Preheat the oven to 375°

Prepare a 10"x15" jelly roll pan by spraying it with Baker's Joy, or use softened butter. Cut out a piece of parchment paper to fit, and spray the top of that as well, or butter that. Set aside.

Separate the eggs, placing the whites in one bowl and the yolks into a larger bowl. Let them come to room temperature, which takes about 15-20 minutes if you had just removed them from the refrigerator.

Beat the whites, gradually adding 1/4 cup of sugar. Continue beating until you have stiff peaks.

Beat the egg yolks until they thicken. Beat in the remaining 1/4 cup of sugar gradually. When the yolks have become very thick and a pale yellow colour, beat in the vanilla extract.  Sift the cake flour evenly over the yolks and carefully fold in.

Carefully fold the beaten whites into the yolk mixture.

If using the food colour, then divide the batter, and add a few drops of food colouring to the portions and gently fold in. Don't worry if it's not entirely even.

Spread the batter or batters evenly into the prepared pan, and bake for about 8-10 minutes or until the cake is done.

Spread a clean cloth towel over a flat surface and sprinkle with icing sugar. Invert the cake onto the towel and carefully peel away the parchment paper. Carefully roll the hot cake into a jelly roll using the towel and allow to cool that way.

* I thought the chocolate was a bit overwhelming for the rest of this dessert. I'd be inclined to either make a vanilla or fruity type sauce, or to half the amount here and use it more sparingly.

Chocolate filling/fudge
2/3 cup heavy cream
8 oz semisweet chocolate chips

Heat the cream until it just starts to simmer; remove from heat. Stir in the chocolate chips and continue to stir until they have melted. Cool slightly.

dulce de leche ice cream
1 1/2 cups whole milk
1  13.4 oz can dulce de leche
1 tbsp coffee liqueur

Heat the milk until bubbles begin to form around the edges. Stir in the dulche de leche and coffee liqueur. Whisk until well combined. Cool in a refrigerator for about an hour.

Process in an ice cream machine according to the manufacturer's directions.

raspberry frozen yogurt
1 1/2 cups greek style yogurt
1/2 cup sugar
1 2/3 cups frozen raspberries

Stir together the yogurt and sugar until the sugar has dissolved. Stir in 1 cup raspberries. I reserve about 2/3 cup and add those towards the end, (for texture).

Process in an ice cream machine according to the manufacturer's directions.

assembly

Carefully unroll the swiss roll and spread about half of the chocolate filling onto it. If the filling has become too stiff, then heat it carefully for a few seconds in a microwave.

Roll up the swiss roll. Place the roll into the freezer for about 15 minutes. Remove and slice.

Place the slices in a single layer into the bottom of a bowl which has been lined with plastic wrap. Spread the raspberry frozen yogurt over the swiss roll layer. Spread the remaining chocolate filling over the frozen yogurt and finish, by filling the remaining bowl with the dulce de leche ice cream. Cover with a piece of parchment paper and freeze the "bombe".

When ready to serve, remove from the freezer and allow to sit for about 10-15 minutes before inverting it onto a plate. Serve immediately.

Sunday, June 27, 2010

Daring Baker Challenge, June 2010; Chocolate Pavlovas with Chocolate Mascarpone Mousse

(about 8 servings)


The June 2010 Daring Bakers’ challenge was hosted by Dawn of Doable and Delicious. Dawn challenged the Daring Bakers’ to make Chocolate Pavlovas and Chocolate Mascarpone Mousse. The challenge recipe is based on a recipe from the book Chocolate Epiphany by Francois Payard.

Recipe 1: Chocolate Meringue (for the chocolate Pavlova):
3 large egg whites
½ cup plus 1 tbsp (110 grams) white granulated sugar
¼ cup (30 grams) confectioner’s (icing) sugar
1/3 cup (30 grams) cocoa powder

Directions:
1.Place a rack in the center of the oven and preheat to 200º F (95º C) degrees. Line two baking sheets with silpat or parchment and set aside.

2.Put the egg whites in a bowl and whip until soft peaks form. Increase speed to high and gradually add granulated sugar about 1 tbsp at a time until stiff peaks form. (The whites should be firm but moist.)

3.Sift the confectioner’s sugar and cocoa powder over the egg whites and fold the dry ingredients into the white. (This looks like it will not happen. Fold gently and it will eventually come together.)

4.Fill a pastry bag with the meringue. Pipe the meringue into whatever shapes you desire. Alternatively, you could just free form your shapes and level them a bit with the back of a spoon. (Class made rounds, hearts, diamonds and an attempt at a clover was made!)

5.Bake for 2-3 hours until the meringues become dry and crisp. Cool and store in an airtight container for up to 3 days.

Recipe 2: Chocolate Mascarpone Mousse (for the top of the Pavlova base):
1 ½ cups (355 mls) heavy cream (cream with a milk fat content of between 36 and 40 percent)
grated zest of 1 average sized lemon
9 ounces (255 grams) 72% chocolate, chopped
1 2/3 cups (390 mls) mascarpone
pinch of nutmeg

2 tbsp (30 mls) Grand Marnier (or orange juice)

Directions:
1.Put ½ cup (120 mls) of the heavy cream and the lemon zest in a saucepan over medium high heat. Once warm, add the chocolate and whisk until melted and smooth. Transfer the mixture to a bowl and let sit at room temperature until cool.

2.Place the mascarpone, the remaining cup of cream and nutmeg in a bowl. Whip on low for a minute until the mascarpone is loose. Add the Grand Marnier and whip on medium speed until it holds soft peaks. (DO NOT OVERBEAT AS THE MASCARPONE WILL BREAK.)

3.Mix about ¼ of the mascarpone mixture into the chocolate to lighten. Fold in the remaining mascarpone until well incorporated. Fill a pastry bag with the mousse. Again, you could just free form mousse on top of the pavlova.

Recipe 3: Mascarpone Cream (for drizzling):
1 recipe crème anglaise
½ cup (120 mls) mascarpone
2 tbsp (30 mls) Sambucca (optional)
½ cup (120 mls) heavy cream

Directions:
1.Prepare the crème anglaise. Slowly whisk in the mascarpone and the Sambucca and let the mixture cool. Put the cream in a bowl and beat with electric mixer until very soft peaks are formed. Fold the cream into the mascarpone mixture.

Recipe 4: Crème Anglaise (a component of the Mascarpone Cream above):
1 cup (235 mls) whole milk
1 cup (235 mls) heavy cream
1 vanilla bean, split or 1 tsp pure vanilla extract
6 large egg yolks
6 tbsp (75 grams) sugar

Directions:
1.In a bowl, whisk together the egg yolks and sugar until the mixture turns pale yellow.

2.Combine the milk, cream and vanilla in a saucepan over medium high heat, bringing the mixture to a boil. Take off the heat.

3.Pour about ½ cup of the hot liquid into the yolk mixture, whisking constantly to keep from making scrambled eggs. Pour the yolk mixture into the pan with the remaining cream mixture and put the heat back on medium. Stir constantly with a wooden spoon until the mixture thickens enough to lightly coat the back of a wooden spoon. DO NOT OVERCOOK.

4.Remove the mixture from the heat and strain it through a fine mesh sieve into a bowl. Cover and refrigerate until the mixture is thoroughly chilled, about 2 hours or overnight.

Assembly:

Pipe the mousse onto the pavlovas and drizzle with the mascarpone cream over the top. Dust with confectioner’s sugar and fresh fruit if desired.

Wednesday, May 26, 2010

Daring Baker Challenge, May 2010, Piece Montée, aka Croquembouche


The May 2010 Daring Bakers’ challenge was hosted by Cat of Little Miss Cupcake. Cat challenged everyone to make a piece montée, or croquembouche, based on recipes from Peter Kump’s Baking School in Manhattan and Nick Malgieri.

I adjusted the recipe for the pastry cream somewhat (to make it caramel-rum) which I have noted below, and I also added a bit of food colouring to the hard caramel glaze. I have copied the recipes we were given:

Preparation time: You will want to use your puff pastry batter and chocolate glaze or caramel as soon as it has been prepared and as close to serving time as possible. This is not a dessert that stores well and it may be a bit temperamental in humid areas as the glaze needs to harden to hold the choux together. The crème patissiere can be made a couple of days in advance and stored in the fridge until ready to use.

You will need approximately 10 minutes to prepare the puff pastry, 10 minutes to pipe and about 30 minutes to bake each batch. The crème patissiere should take about 10 minutes to cook and then will need to be cooled for at least 6 hours or overnight. The glazes take about 10 minutes to prepare.

Ingredients:

*For the Vanilla Crème Patissiere (Half Batch)
1 cup (225 ml.) whole milk
2 Tbsp. cornstarch
6 Tbsp. (100 g.) sugar
1 large egg
2 large egg yolks
2 Tbsp. (30 g.) unsalted butter
1 Tsp. Vanilla

Dissolve cornstarch in ¼ cup of milk. Combine the remaining milk with the sugar in a saucepan; bring to boil; remove from heat.

Beat the whole egg, then the yolks into the cornstarch mixture. Pour 1/3 of boiling milk into the egg mixture, whisking constantly so that the eggs do not begin to cook.

Return the remaining milk to boil. Pour in the hot egg mixture in a stream, continuing whisking.

Continue whisking (this is important – you do not want the eggs to solidify/cook) until the cream thickens and comes to a boil. Remove from heat and beat in the butter and vanilla.

Pour cream into a stainless steel/ceramic bowl. Press plastic wrap firmly against the surface. Chill immediately and until ready to use.

*For Caramel-Rum Pastry Cream. I used brown sugar instead of white which I reduced to 4 tbsp. I added a tbsp of water to the sugar and cooked it until it caramelized.

Then I slowly whisked in the butter and 3/4 of the milk (with 3 tbsp of cornstarch mixed in). I beat the egg yolks into the last 1/4 cup of the milk and cornstarch mixture, (I omitted the whole egg). Then I beat in a few tbsp of the hot custard mixture, and then whisked the egg mixture back into the custard.

Once the mixture had come to a simmer and thickened nicely, I removed it from the heat and whisked in 2 tbsp of dark rum.

For Chocolate Pastry Cream (Half Batch Recipe):
Bring ¼ cup (about 50 cl.) milk to a boil in a small pan; remove from heat and add in 3 ounces (about 80 g.) semisweet chocolate, finely chopped, and mix until smooth. Whisk into pastry cream when you add the butter and vanilla.

For Coffee Pastry Cream (Half Batch recipe)
Dissolve 1 ½ teaspoons instant espresso powder in 1 ½ teaspoons boiling water. Whisk into pastry cream with butter and vanilla.

Pate a Choux (Yield: About 28)
¾ cup (175 ml.) water
6 Tbsp. (85 g.) unsalted butter
¼ Tsp. salt
1 Tbsp. sugar
1 cup (125 g.) all-purpose flour
4 large eggs

For Egg Wash: 1 egg and pinch of salt

Pre-heat oven to 425◦F/220◦C degrees. Line two baking sheets with parchment paper.

Preparing batter:

Combine water, butter, salt and sugar in a saucepan over medium heat. Bring to a boil and stir occasionally. At boil, remove from heat and sift in the flour, stirring to combine completely.

Return to heat and cook, stirring constantly until the batter dries slightly and begins to pull away from the sides of the pan.

Transfer to a bowl and stir with a wooden spoon 1 minute to cool slightly.

Add 1 egg. The batter will appear loose and shiny.

As you stir, the batter will become dry-looking like lightly buttered mashed potatoes.

It is at this point that you will add in the next egg. Repeat until you have incorporated all the eggs.

Piping:

Transfer batter to a pastry bag fitted with a large open tip (I piped directly from the bag opening without a tip). Pipe choux about 1 inch-part in the baking sheets, ( I placed parchment paper over my baking sheets first). Choux should be about 1 inch high about 1 inch wide.

Using a clean finger dipped in hot water, gently press down on any tips that have formed on the top of choux when piping. You want them to retain their ball shape, but be smoothly curved on top.

Brush tops with egg wash (1 egg lightly beaten with pinch of salt).

Baking:

Bake the choux at 425◦F/220◦C degrees until well-puffed and turning lightly golden in color, about 10 minutes.

Lower the temperature to 350◦F/180◦C degrees and continue baking until well-colored and dry, about 20 minutes more. Remove to a rack and cool.

Can be stored in a airtight box overnight.

Filling:

When you are ready to assemble your piece montée, using a plain pastry tip, pierce the bottom of each choux. Fill the choux with pastry cream using either the same tip or a star tip, and place on a paper-lined sheet. Choux can be refrigerated briefly at this point while you make your glaze.

Use one of these to top your choux and assemble your piece montée.

Chocolate Glaze:
8 ounces/200 g. finely chopped chocolate (use the finest quality you can afford as the taste will be quite pronounced; I recommend semi-sweet)

Melt chocolate in microwave or double boiler. Stir at regular intervals to avoid burning. Use the best quality chocolate you can afford. Use immediately.

Hard Caramel Glaze:
1 cup (225 g.) sugar
½ teaspoon lemon juice

Combine sugar and lemon juice in a saucepan with a metal kitchen spoon stirring until the sugar resembles wet sand. Place on medium heat; heat without stirring until sugar starts to melt around the sides of the pan and the center begins to smoke. Begin to stir sugar. Continue heating, stirring occasionally until the sugar is a clear, amber color. Remove from heat immediately; place bottom of pan in ice water to stop the cooking. Use immediately.

Assembly of your Piece Montée:

You may want to lay out your unfilled, unglazed choux in a practice design to get a feel for how to assemble the final dessert. For example, if making a conical shape, trace a circle (no bigger than 8 inches) on a piece of parchment to use as a pattern. Then take some of the larger choux and assemble them in the circle for the bottom layer. Practice seeing which pieces fit together best.

Once you are ready to assemble your piece montée, dip the top of each choux in your glaze (careful it may be still hot!), and start assembling on your cake board/plate/sheet. Continue dipping and adding choux in levels using the glaze to hold them together as you build up. (You may want to use toothpicks to hold them in place – see video #4 below).

When you have finished the design of your piece montée, you may drizzle with remaining glaze or use ribbons, sugar cookie cut-outs, almonds, flowers, etc. to decorate. Have fun and enjoy! Bon appétit!

Additional Information: Here are some videos you may want to take a look at before you get started on your piece montée.

1) Martha Stewart Assembles a Croquembouche:
http://www.marthastewart.com/recipe/marthas-famous-croquembouche
2) Assembling croquembouche using the interior of a cylinder:
http://www.youtube.com/watch?v=Fq-UgMxe0Y4
3) Asembling Free-standing Croquembouche with Chocolate Glaze:
http://www.youtube.com/watch?v=ZrIanD5pi9E&feature=related
4) Assembling a Croquembouche with Toothpicks and Cone:
http://www.youtube.com/watch?v=vIGaidsM-NI&feature=related
See this google images search of Croquembouche for inspiration:
http://images.google.com/images?hl=en&source=hp&q=croquembouche&btnG=Sea...
Here’s a link to a dairy-free pate a choux and crème patisserie recipe:
http://dairyfreecooking.about.com/od/dessertsbeverages/r/creampuffs.htm

Monday, April 26, 2010

Daring Baker Challenge, April 2010, British Suet Pudding; Steak & Kidney

(about 6-8 servings)


This month's challenge was hosted by Esther from The Lilac Kitchen.  She proposed making steamed puddings using suet, and we had the choice of sweet or savory, using one of two methods.

Initially I thought a lot about making a traditional plum pudding, and then toyed with the idea of making something with ginger, pear and caramel. In the end I made a steak and kidney pudding with mushrooms, pearl onions and red wine.

I ended up cheating. Although I boiled my pudding for 5 1/2 hours, the crust refused to turn brown, so I popped it in the oven and left it there for about 20 minutes until I liked the colour.

Dallas in many respects can be lovely, but when it comes to finding certain items, I begin to realise just how pedestrian a place this can be.  Kidneys? OMG! What a fiasco!

I called two Whole Foods markets and neither had any; the second fellow I spoke with, asked me incredulously "kidney beans or kidneys? I called a butcher who had been given the "Dallas Butcher of the Year" award a couple of years back and he told me these days, that kind of stuff generally got packed up and shipped to pet food manufacturers. I called at least a dozen places before hitting the jackpot at Central Market.  I had to special order them, and three whole days later, they did not arrive. /cry

Then I remembered Kuby's, the German meat market and deli, and gave them a call. They had veal kidneys! I was way too excited over these kidneys, but heh, this is Dallas.

We were given a few basic recipes which I used as a guide, ending up with the following, once I was done:

Suet Pastry
3 1/2 cups of unbleached flour
1 tsp baking powder
salt
1 3/4 cups suet
3/4 -1 1/4 cup water

Combine the flour, baking powder and salt in a bowl. Add the suet and mix gently with your hands.

Add 3/4 cup water and stir. Keep adding the water in small amounts until the dough forms into a ball. Knead a few times and then cover and set aside.

Steak and Kidney Filling
1/2 lb beef, veal or lamb kidneys, (anything you can get your hands on!)
2 cups water
1 tbsp vinegar

1 1/2 lb beef chuck, cut into 1 1/2" cubes
1/4 cup flour
1 tbsp fresh thyme, or 1 tsp dried thyme
small handful fresh parsley, chopped
salt and a generous amount of freshly ground black pepper
1 cup pearl onions, peeled
1 cup fresh mushrooms, sliced

1 cup beef broth
1 cup red wine


Remove the membranes from the kidneys and then slice them lengthwise and remove the fatty cores. Place them in the water and vinegar for about an hour. Remove, pat dry and cut into small cubes.

Place the kidneys, beef, onions and mushrooms into a bowl. Sprinkle the flour, thyme, parsley, salt and pepper over the meat and toss to mix.

Remove about 1/4 of the suet pastry and reserve that for the top crust. Roll out the remaining dough and line a well buttered 1 1/2 quart  pudding basin or deep casserole. Leave about an inch of pastry hanging over the edge.

Add the meat and vegetable filling.

Combine the beef broth and wine and pour that over the meat.

Roll out the remaining piece of dough and place over the top. Turn up the overlapping pieces of dough and seal to prevent the gravy from escaping while the pudding is steaming.

Top with a piece of foil or parchment paper. Tie it down with string.

Place the pudding into a *large pot and add enough boiling water to come up about 2/3 of the way up the pudding basin. Cover and boil for about 5-6 hours, checking every hour so to see if you need to top up the water.

*The pudding basin itself shouldn't touch the bottom of the pot. You can place it on top of an inverted plate or a scrunched up piece of foil, or something that can withstand the boiling water.

The pudding will be done when the suet pastry has turned a light golden brown. From what I've read, it's almost impossible to overcook a pudding**.

**I left mine to boil for 5 1/2 hours, after which time the pastry wasn't changing colour, so I popped it into the oven for 20 minutes at 375°F.

Saturday, March 27, 2010

Daring Baker Challenge, March 2010, Orange Tian

(8-10 servings)


Last month I became a member of the Daring Kitchen, and by the end of the month I signed up for Daring Bakers. I may sign up for Daring Cooks as well at some point.

Each month recipes are revealed and then over 2000 bakers/cooks from around the world create one of those recipes in their kitchens. Substitutions are only allowed for such things as food allergies/intolerances or ingredients which are unavailable in certain regions.

Looking through the photos and comments members send in of their resulting recipe is quite intriguing; so many interpretations of the same thing. It's really quite wonderful, and what prompted me to join and give it a try.

This month's baker challenge was hosted by Jennifer from Chocolate Shavings and she proposed an Orange Tian, a dessert she had made for the first time a few months earlier at a cooking school in France.
We made everything from scratch, including the marmalade, and the finished dessert was quite tasty.

I decided not to mess around with cookie cutters because I don't have enough. I used a 9" spring-form instead which turned out to be a challenge. Although I left the dessert in the freezer for twice the amount of time, it clearly wasn't enough. After I carefully loosened the edges and inverted it onto the cake plate, it didn't hold it's shape. I nearly died laughing. If I make this again, I might increase the amount of gelatin to 2 teaspoons and I'll definitely leave it in the freezer longer.

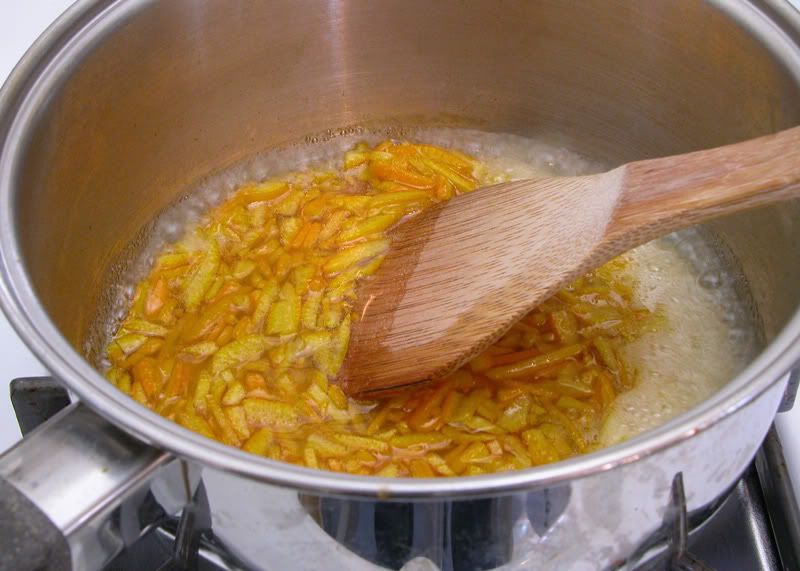
The only changes I made (I also used one grapefruit for colour) was for the marmalade. I didn't bother with the pectin and the mixture gelled just fine without it. It was so delicious I regretted not making more of it. The recipe calls for the peel of 1 orange, and I used 3 (for a little extra) when I should have used up the peels from all of the oranges. There's always a next time.


Needless to say, I'm really looking forward to the next challenge.

Below, I have copied the recipes we were given:

Recipe Source: Recipe slightly adapted from Alain Ducasse‘s Cooking School in Paris, France

For the Pate Sablee:
Ingredients U.S. Imperial Metric Instructions for Ingredients
2 medium-sized egg yolks at room temperature
granulated sugar 6 tablespoons + 1 teaspoon; 2.8 oz; 80 grams
vanilla extract ½ teaspoon
Unsalted butter ¼ cup + 3 tablespoons; 3.5 oz; 100 grams ice cold, cubed
Salt 1/3 teaspoon; 2 grams
All-purpose flour 1.5 cup + 2 tablespoons; 7 oz; 200 grams
baking powder 1 teaspoon ; 4 grams

Directions:

Put the flour, baking powder, ice cold cubed butter and salt in a food processor fitted with a steel blade.

In a separate bowl, add the eggs yolks, vanilla extract and sugar and beat with a whisk until the mixture is pale. Pour the egg mixture in the food processor.

Process until the dough just comes together. If you find that the dough is still a little too crumbly to come together, add a couple drops of water and process again to form a homogenous ball of dough. Form into a disc, cover with plastic wrap and leave to rest in the fridge for 30 minutes.

Preheat your oven to 350 degree Fahrenheit.

Roll out the dough onto a lightly floured surface until you obtain a ¼ inch thick circle.

Using your cookie cutter, cut out circles of dough and place on a parchment (or silicone) lined baking sheet. Bake for 20 minutes or until the circles of dough are just golden.


For the Marmalade:
Ingredients U.S. Imperial Metric Instructions for Ingredients
Freshly pressed orange juice ¼ cup + 3 tablespoons; 3.5 oz; 100 grams
1 large orange used to make orange slices
cold water to cook the orange slices
pectin 5 grams
granulated sugar: use the same weight as the weight of orange slices once they are cooked

Finely slice the orange. Place the orange slices in a medium-sized pot filled with cold water. Simmer for about 10 minutes, discard the water, re-fill with cold water and blanch the oranges for another 10 minutes.

Blanch the orange slices 3 times. This process removes the bitterness from the orange peel, so it is essential to use a new batch of cold water every time when you blanch the slices.

Once blanched 3 times, drain the slices and let them cool.

Once they are cool enough to handle, finely mince them (using a knife or a food processor).

Weigh the slices and use the same amount of granulated sugar . If you don’t have a scale, you can place the slices in a cup measurer and use the same amount of sugar.

In a pot over medium heat, add the minced orange slices, the sugar you just weighed, the orange juice and the pectin. Cook until the mixture reaches a jam consistency (10-15 minutes).

Transfer to a bowl, cover with plastic wrap and put in the fridge.

For the Orange Segments:
For this step you will need 8 oranges.

Cut the oranges into segments over a shallow bowl and make sure to keep the juice. Add the segments to the bowl with the juice.

[See YouTube video in the References section below for additional information on segmenting oranges.]

For the Caramel:
Ingredients U.S. Metric Imperial Instructions for Ingredients
granulated sugar 1 cup; 7 oz; 200 grams
orange juice 1.5 cups + 2 tablespoons; 14 oz; 400 grams

Place the sugar in a pan on medium heat and begin heating it.

Once the sugar starts to bubble and foam, slowly add the orange juice. As soon as the mixture starts boiling, remove from the heat and pour half of the mixture over the orange segments.

Reserve the other half of the caramel mixture in a small bowl — you will use this later to spoon over the finished dessert. When the dessert is assembled and setting in the freezer, heat the kept caramel sauce in a small saucepan over low heat until it thickens and just coats the back of a spoon (about 10 minutes). You can then spoon it over the orange tians.

[Tip: Be very careful when making the caramel — if you have never made caramel before, I would suggest making this step while you don’t have to worry about anything else. Bubbling sugar is extremely, extremely hot, so make sure you have a bowl of ice cold water in the kitchen in case anyone gets burnt!]

For the Whipped Cream:
Ingredients U.S. Metric Imperial Instructions for Ingredients
heavy whipping cream 1 cup; 7 oz; 200 grams
3 tablespoons of hot water
1 tsp Gelatine
1 tablespoon of confectioner's sugar
orange marmalade (see recipe above) 1 tablespoon

In a small bowl, add the gelatine and hot water, stirring well until the gelatine dissolves. Let the gelatine cool to room temperature while you make the whipped cream. Combine the cream in a chilled mixing bowl. Whip the cream using a hand mixer on low speed until the cream starts to thicken for about one minute. Add the confectioner sugar. Increase the speed to medium-high. Whip the cream until the beaters leave visible (but not lasting) trails in the cream, then add the cooled gelatine slowly while beating continuously. Continue whipping until the cream is light and fluffy and forms soft peaks. Transfer the whipped cream to a bowl and fold in the orange marmalade.

[Tip: Use an ice cold bowl to make the whipped cream in. You can do this by putting your mixing bowl, cream and beater in the fridge for 20 minutes prior to whipping the cream.]

Assembling the Dessert:

Make sure you have some room in your freezer. Ideally, you should be able to fit a small baking sheet or tray of desserts to set in the freezer.

Line a small tray or baking sheet with parchment paper or a silicone sheet. Lay out 6 cookie cutters onto the parchment paper/silicone.

Drain the orange segments on a kitchen towel.

Have the marmalade, whipped cream and baked circles of dough ready to use.

Arrange the orange segments at the bottom of each cookie cutter. Make sure the segments all touch either and that there are no gaps. Make sure they fit snuggly and look pretty as they will end up being the top of the dessert. Arrange them as you would sliced apples when making an apple tart.

Once you have neatly arranged one layer of orange segments at the bottom of each cookie cutter, add a couple spoonfuls of whipped cream and gently spread it so that it fills the cookie cutter in an even layer. Leave about 1/4 inch at the top so there is room for dough circle.

Using a butter knife or small spoon, spread a small even layer of orange marmalade on each circle of dough.

Carefully place a circle of dough over each ring (the side of dough covered in marmalade should be the side touching the whipping cream). Gently press on the circle of dough to make sure the dessert is compact.

Place the desserts to set in the freezer to set for 10 minutes.

Using a small knife, gently go around the edges of the cookie cutter to make sure the dessert will be easy to unmold. Gently place your serving plate on top of a dessert (on top of the circle of dough) and turn the plate over. Gently remove the cookie cutter, add a spoonful of caramel sauce and serve immediately.

Resources:
http://www.wisegeek.com/what-is-a-tian.htm (An article about the dessert known as tian.)
YouTube link on how to segment an orange: http://www.youtube.com/watch?v=ZG5mcEEBlcI
To learn more about Pectin: http://en.wikipedia.org/wiki/Pectin
What to substitute for Pectin: http://www.gourmetsleuth.com/Dictionary/P/Pectin-6222.aspx