Showing posts with label bread. Show all posts

Sunday, March 13, 2016

Hot Cross Buns

(1 dozen)


These hot cross buns are light, fluffy and moist. I love cardamom and that's the dominant spice here, but you could replace that with more cinnamon, if you prefer.


I like to soak the currants and citrus peel overnight in juice until they plump up. This helps keep these buns nice and moist in case you don't inhale all of them when they first come fresh out of the oven.

buns
3/4 cup currants
1/4 cup candied citrus peel, chopped (optional)
1/3 cup apple, orange or cranberry juice
1 1/3 cup milk
1/4 lb unsalted butter, (1 stick)
3 tbsp honey
about 4 cups bread flour, divided
1 pkg active dry yeast (2 1/4 tsp)
1 tsp ground cardamom
1/2 tsp ground cinnamon
3/4 tsp salt
1/4 tsp ground dried ginger
1/8 tsp ground nutmeg
1 large egg at room temperature

The day before you plan on making the buns, combine the currants and chopped citrus peel in a small bowl. Stir in the juice and cover with wrap.  Leave overnight until the fruit has plumped up.

Heat the milk taking care it doesn't come to a boil. Cut up the butter and stir into the hot milk. Add the honey. Stir until most of the butter has melted and the milk has cooled to lukewarm. Set aside.

Combine 3 2/3 cups flour, yeast, cardamom, salt, cinnamon, ginger and nutmeg in a large bowl until well mixed. Make a well in the center and set aside.

Whisk the egg into the milk and butter mixture, then pour this into the well of the flour mixture. Drain the currants and citrus peel and add this to the bowl as well.


Stir the mixture together until you have a soft sticky dough. Add small amounts of flour to this mixture until you have a soft but very tacky dough that you can knead for about 5 minutes. Take care not to add too much flour. Grease your hands, if needed to prevent the dough from sticking too much.

When the dough looks smooth and elastic, return to the bowl and cover with plastic wrap. Leave on the counter until the dough has doubled in volume; about 1 1/2 hours.

Punch down the dough and divide into 12 equal pieces. Roll the pieces into balls and place into a lightly buttered  9" x 13" baking dish, 3 balls by 4 balls.

Cover and allow to rise again until doubled in volume; about 1 hour.


Preheat oven to 375°F.

egg wash
1 egg yolk
1 tbsp milk

Whip together the egg yolk and milk with a fork. Carefully brush the mixture over the tops of the buns.

flour mixture for crosses
3 tbsp flour
3 tbsp water

Combine the flour and water. Stir until the mixture is smooth and free of lumps. Place the mixture into a small plastic bag. Snip off the corner, taking care not to cut off too much.

Pipe crosses on the buns. The flour mixture will spread a bit.

Bake in the center of the oven for about 25-35 minutes or until the tops have browned and the interior temperature reaches about 195°F.

Sunday, December 13, 2015

Nattalia's Rum Stollen

( 2 loaves)


This is a recipe my mother passed along to me this year. It produces a delicious and very rich rum stollen, a traditional German Christmas bread.

I made my own candied orange and lemon peel because the only candied peel I was able to find in Sequim contained high fructose corn syrup. This was manageable because making this stollen took two days (soaking the nuts and raisins).

The finished loaves were then wrapped in parchment and left in a cool dark place for a week to allow the flavors to fully develop.

candied orange and lemon peel
1 large organic lemon
1 small to medium organic navel orange
2 cups water
1/2 tsp salt

2/3 cup sugar
1/3 cup water

about 3 tbsp fine granulated sugar

Wash and dry the lemon and orange. Cut off the tops and bottoms of the lemon. Cut off the peel in strips, yellow and white parts. Cut these pieces into small dice.

Repeat with the orange.

Place the water and salt into a small saucepan. Stir until the salt has dissolved. Add the lemon and orange peel. Bring up to a gentle simmer over medium heat. Cook for about 3 minutes. Drain.


Add enough cold water to cover the peel and bring back up to a simmer. Cook 3 minutes and drain the peel again.

Empty the saucepan and combine the sugar and water. Stir until the sugar has dissolved. Bring the mixture up to a gentle simmer. Add the peel and cook for about 30 minutes or until the peel is tender and translucent.

Sprinkle a piece of parchment paper with about 1 1/2 tablespoons sugar. Using a slotted spoon, remove the peel from the syrup, shake off the excess liquid and spread over the sugared parchment paper in a single layer. When all of the peel is spread out, sprinkle the remaining sugar over the top. Allow to dry overnight.

(There was a small amount of citrus flavored syrup leftover which I used in my tea).

rum stollen
2 cups raisins
about 1 cup dark rum, divided
1 cup sliced almonds
1/2 tsp almond extract
1/2 lb butter, 2 sticks warmed until runny, but not hot
4 cups flour, divided
3/4 cup lukewarm milk
2 tsp dry active yeast
3 tbsp sugar
1/2 tsp cardamom
1 cup candied lemon and orange peel
1 tbsp flour

The day before you plan on baking this, place the raisins in a small bowl and sprinkle with half a cup of rum. Cover with plastic wrap and set aside overnight, stirring at least once or twice.

Place the almonds in another small bowl. Combine about 1/3 of a cup of rum with the almond extract. Pour this mixture over the almonds and cover with plastic wrap. Set aside overnight, stirring at least once or twice.

The next morning combine the butter with 2 cups of flour. Refrigerate this mixture while you prepare the yeast dough.

Combine the milk, yeast and sugar. Let sit until the yeast has dissolved.

Place the remaining 2 cups of flour and cardamom into the bowl of a 9 or 11 cup food processor. Pulse a few times to combine.

With the motor running pour the milk and yeast mixture down the chute. Turn off the motor when the dough begins to come together.


Take the top off the food processor. Break up the dough and distribute evenly around the bowl. Remove the flour and butter mixture from the refrigerator and form small walnut sized balls. Place about 5 or 6 of those around the yeast dough. Replace the top and pulse a few times to combine.

Drop the remaining flour and butter mixture in small pieces down the chute until all of it has been combined with the yeast dough.

Process until you have a smooth ball of dough, taking care not to let the mixture get too hot. Place into a dish and cover with plastic wrap. Wait until the dough has risen about 2 1/2 times; about 2-3 hrs.

Drain the raisins and almonds, reserving the leftover rum. Combine the fruit and nuts with 1 cup of the candied lemon and orange peel (reserve the rest for another use).

Add the flour and toss. Set aside.

Divide the dough in half. Roll out one piece to about 1/4 inch thickness; about 12 x 14". Cover with half of the fruit and nut mixture. Cover loosely with plastic wrap for about 15 minutes.

Roll the ends like a jelly roll towards the center. Flatten the dough and then roll up again from the bottom to the top. Gently roll into a rectangle about 6" x 10 ". Fold in half with the top not quite meeting the other side; see photo.

Place onto a silicone mat or a piece of parchment paper. Cover with a light dry kitchen towel to rise until doubled; up to 4 hours.

Repeat with the remaining piece of dough.

Preheat oven to 350F. Set the racks so that the stollen bakes in the upper top portion of the oven; about 2 to 3 notches down.

Bake the stollen for 50-65 minutes or until done. Remove from oven.

to finish
3 tbsp butter
the leftover and reserved rum
about 1/2 cup fine granulated sugar
about 1/2 cup icing sugar (confectioners)

Quickly prepare the glaze to brush onto the warm stollen. Gently heat the leftover rum with the butter. Brush this mixture onto both sides of each loaf until you have used all of it.


Roll each warm loaf in granulated sugar; both sides. Then dust each loaf generously with powdered sugar. Allow to cool.

Wrap the cooled loaves in parchment paper. (My mother was pretty insistent not to use plastic. She told me the loaves shouldn't "sweat". I couldn't help myself. I placed one parchment wrapped loaf into a paper bag and the other into a *plastic bag). Allow the loaves to sit in a cool dark place for at least a week. This gives the flavors a chance to mellow.

A week later *I preferred the stollen that had been placed in plastic. I thought the stollen wrapped in parchment paper and then placed into a paper bag was a bit on the dry side.

Sunday, March 1, 2015

Nattalia's Caraway Rye Bread

(2 small loaves)


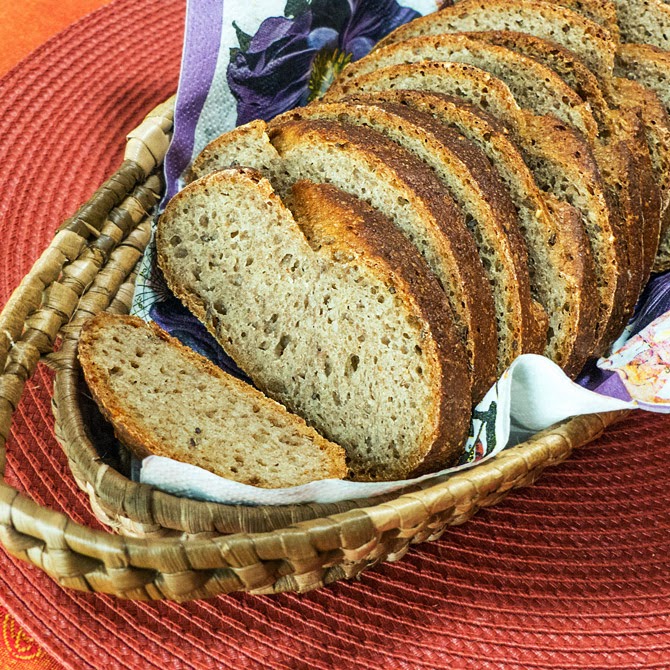
Hands down, my mum makes the best rye bread. In my opinion it's way better than what the local bakery sells. Her bread has a nice crisp crust, a flavorful and chewy interior which isn't too dense or too fluffy.

Starting off with her base recipe, she'll make changes depending on what she has on hand, but her method, gleaned from various cookbooks and through trial and error remains the same. I did notice all of my mum's flours are from Bob's Red Mill. I asked her about that and she told me she basically stocks up on whichever flour happens to be on sale, opting for organic whenever possible. She also likes the King Arthur brand. Often she adds rye flakes if she has them, this time she added a 7 grain cereal mix with flaxseed instead.

This recipe turned into a two week process (mostly waiting). You could finish the bread sooner if you prefer, however the flavor of the dough improves the longer it sits in the refrigerator.

caraway rye bread
1 1/2  cups rye flour
1 1/4 cups whole wheat flour
1 cup all purpose flour
2 tbsp dry Bob's Red Mill 7 grain hot cereal (can replace with rye flour or rye flakes)
2 tbsp vital wheat gluten
2 1/4 tsp dry yeast (my mum prefers Fleischmann's, although sometimes she uses Saf-Instant)
2 1/4 tsp caraway seeds 
1 1/2 tsp salt
2 cups water

equipment used
11 cup Cuisinart food processor
thermometer
large glass container with lid (for storing the dough in the refrigerator)
parchment paper
baking stone
10 ice cubes
ovenproof metal container (to hold ice cubes)

Into a bowl or using a large measuring cup, measure out the rye flour, whole wheat flour, all purpose flour, cereal, and gluten . You can change things up a bit if you like, but the final (flour) measurement needs to equal 4 cups.


Dump the flour mixture into the bowl of an 11 cup food processor. Add the yeast, caraway seeds and salt. Run the processor for about 10 seconds to combine.

This was where things got interesting for me. My mum took the temperature of her flour which was about 70°F. and to that added water which was 60°F. She told me the combined temperatures need to be 130°F for a Cuisinart or Kitchenaid food processor. I think the combined temperatures for a Braun was 150°F. She told me she came across this procedure in Charles van Over's "The Best Bread Ever".


She poured the water over the flour and stirred it up a bit with a spoon. She allowed the mixture to sit in her food processor for about two minutes. Then she pulsed everything for 45 seconds, stopping when a soft, gooey ball of dough had formed. She again took the temperature of the dough and was pleased when it registered about 74°F. She told me the ideal temperature is about 75°F, with anything from 71°F to 79°F being acceptable. If the dough is warmer than 80°F, then place it into the refrigerator for several minutes to cool down.


Butter a glass container, one with a lid that is large enough to hold the dough (after it's risen). Drop in the dough and leave it out on the counter  until it has doubled in size; about 1 hour. Cover and refrigerate up to 2 weeks. My mum told me that the flavor improves the longer it sits in the refrigerator. I imagine you could bake it up after a day or two if you can't wait.

on the day of baking
Prepare a cornstarch glaze for brushing onto the loaves. You can keep any that's leftover refrigerated for several weeks.

cornstarch glaze
1 tbsp cornstarch
1 tsp salt
3/4 cup cold water

Combine the cornstarch and salt in a small pot. Add a small amount of water and whisk until it is smooth. Slowly whisk in the rest of the water. Heat the mixture while stirring, until it thickens. Remove from heat and allow to cool.

Remove the container of dough from the refrigerator . Lightly flour a surface and dump the dough onto it. It's essential that the dough be handled minimally. Cut it in half and then gently roll and shape each half into a loaf. Place onto a piece of parchment paper and allow to rise for about an hour or so. The bread might not completely double in size. My mum's loaves kind of relaxed sideways as they came to room temperature.

About an hour before the bread is ready to bake, preheat the oven (and stone) to 500°F. Place the stone onto the top rack which should be in the middle of the oven. The second rack should be below that holding a metal pan for the ice cubes which will be added later. My mum picked up a small cast iron frying pan just for holding the ice cubes. It doesn't warp as it heats up.


Just before the bread is ready to be baked, brush each loaf with the reserved cornstarch mixture. Then using a very sharp knife, cut a few slits (about 1/2 an inch deep) across the top of each loaf.

Carefully place them onto the preheated stone. Add the ice cubes to the pan and close the oven door. Reduce the temperature to 450°F. and bake for about 30 minutes or until the loaves are done.


Remove the bread from the oven. Allow to cool completely on a rack, before cutting.


Sunday, January 12, 2014

Seeded No-Knead Barley Bread

(1 loaf)


Last October I came across a recipe for Greek barley bread posted by Magda on her blog, My Little Expat Kitchen. Her gorgeous barley bread had me drooling and I had been wanting to make some version of her loaf ever since then.

I was really happy with the way this turned out. I had a nice dense, chewy, moist loaf of bread!

inspired by Magda's Greek Barley Bread
1 1/4 cups barley flour
1 1/4 cups unbleached flour
1/2 cup whole wheat flour
1/2 cup oat flour
3 tbsp sunflower seeds
2 tbsp flax seeds
1 1/4 tsp dried yeast
1/2 tsp salt
1 1/2 cups water, lukewarm
1 tbsp olive oil
1 tsp honey

additional unbleached flour, if needed

In a large bowl combine the flours, sunflower seeds, flax seeds, yeast and salt. Make a well in the center.

Add the water to a large measuring cup and stir in the olive oil and honey. Pour this into the flour mixture and stir until you have a heavy dough. You might have to flour your hands and knead the dough a few times in the bowl. It will be soft and quite sticky. At this stage don't too much additional flour, if you can help it. Cover with plastic wrap and set in a draft free place for about 6 hours.

Punch down the dough and leave for another 6-8 hours. Keep repeating this for a day or so. Initially the risen dough will have a lot of small holes in it. Eventually with repeated risings the dough will become quite smooth indicating the gluten has had a chance to develop. In my case this took about one and a half days in a room that was about 65°F.

Punch down the dough and shape it into a ball. The dough should be smooth and slightly sticky. Lightly dust it with flour, if needed. Make a few cuts on the surface using a sharp knife. Let it sit for about 20-40 minutes; enough to for it to begin to rise again, but not until it has doubled.


Preheat oven to 450°F.

I followed Magda's suggestion and crumpled up a piece of parchment paper that I placed inside the Dutch oven. I then covered the pot with its lid and placed that into my preheated oven for about 10 minutes.

When the Dutch oven is good and hot, carefully pull it out and place the the dough into pot (over the crumpled parchment paper) and cover with the hot lid taking care not to burn yourself. Reduce the temperature to 375°F and bake for about 25-30 minutes.

Remove the lid and bake an additional *15-20 minutes or until the crust has nicely browned and the loaf sounds hollow when you tap it. *At the end of 20 minutes my loaf wasn't quite brown enough. I was reluctant to leave it in longer because I was afraid it might dry out, so I turned on the broiler for a couple of minutes just to brown the top slightly. The loaf was perfect!

Allow the bread to cool completely before cutting into it.


Sunday, May 27, 2012

Challah, Daring Bakers Challenge; May 2012

(1 loaf)


May’s Daring Bakers’ Challenge was pretty twisted – Ruth from The Crafts of Mommyhood challenged us to make challah! Using recipes from all over, and tips from “A Taste of Challah,” by Tamar Ansh, she encouraged us to bake beautifully braided breads.

I made half the recipe and my loaf turned out really well. I had a bit of trouble with the 6 strand braid, but I imagine if make another loaf, I will get the hang of it.

Below I have listed the quantities for half a loaf.

Challah (Honey White)

(adapted from Tammy’s Recipes)

Ingredients
3/4 cup warm water, separated
1 tsp  sugar
1 tbsp dry active yeast
2 tbsp honey
2 tbsp light colored vegetable oil, or olive oil if you prefer

2 large eggs
3/4 tsp salt
2 1/2 cups all-purpose (plain) flour, plus more as needed (up to 4-4 1/2 cups total)
1 egg beaten with 1 tsp. water


Directions:

1. In mixer bowl/large mixing bowl combine ½ cup warm water, 1 Tbsp. sugar and 2 Tbsp. yeast. Allow to proof approximately 5 minutes until foamy.
2. To the yeast mixture add the remaining water, honey, oil, eggs, salt and 2 1/2 cups of flour. Knead (by hand or with your mixer’s dough hook) until smooth, adding flour as needed. Knead for approximately 10 minutes.
3. Transfer dough to a clean, oiled bowl, turn to coat or add a bit more oil on top. Cover bowl with a kitchen/tea towel. Leave to rise in a warm place until doubled, about 1 ½ hours.


4. Punch down the dough and shape as desired.
5. Place loaf on parchment lined or greased baking sheet, cover with a towel, allow to rise 30 minutes.
6. Preheat oven to 325 degrees.
7. Brush loaf with egg wash. (Sprinkle with seeds or toppings here if wanted.)
8. Bake 30-40 minutes until done.
9. Cool on wire rack.

Monday, December 26, 2011

Daring Baker Challenge, December 2011; Sour Dough Starter


Our Daring Bakers Host for December 2011 was Jessica of My Recipe Project and she showed us how fun it is to create Sour Dough bread in our own kitchens! She provided us with Sour Dough recipes from Bread Matters by AndrewWhitley as well as delicious recipes to use our Sour Dough bread in from Tonia George’s Things on Toast and Canteen’s Great British Food!
I was thrilled with this challenge. I lost my previous 6-year old starter when we had a four day power outage during extremely high temperatures here in Dallas. This gave me the opportunity to get another one going. Mine took nine days to come to life, but the wait was worth it. The aroma is amazing and it has a wonderful tang which I imagine will develop nicely as time goes on.
I decided to make the French Country Bread, which I've copied out below.


Thanks for this challenge!


Saturday, October 15, 2011

Whole Wheat Potato Bread

(9 x 5 inch loaf)


I baked this loaf a few days ago and it's still wonderfully moist and slightly chewy. I have been experimenting a bit with potato/flour ratios when making potato bread and love the way this particular loaf turned out.

Tuesday, September 27, 2011

Daring Baker Challenge, September 2011; Croissants

The Daring Bakers go retro this month! Thanks to one of our very talented non-blogging members, Sarah, the Daring Bakers were challenged to make Croissants using a recipe from the Queen of French Cooking, none other than Julia Child!


Sunday, May 1, 2011

No Knead Beer Bread with Roasted Garlic and Cheese


This is probably the best loaf of no-knead bread I have made yet! The aroma of bread and garlic while it was baking had my knees trembling with excitement. The texture was looser and chewier than usual, possibly because I used a tad less flour than usual (I ran out). Or perhaps this was the beer talking; I will have to make another loaf to be certain!

Before I knew who Jim Lahey was, I would bake a loaf of bread on occasion. I went through various stages of bread making over the years. I made it completely by hand, then invested in a bread machine which took up a huge amount of space. Eventually I grew tired of the paddle hole at the bottom of the oddly shaped loaves which emerged, so I would let the machine do the work, then I'd remove the dough and shape and bake it the conventional way.

This past year with a few exceptions, I have mostly made the no knead bread, trying out different flours and flavours. This week was no different. I decided to swap out the water for beer and I was thrilled with my loaf of bread.

Thursday, February 24, 2011

No Knead Parmesan Bread


I haven't tired of Jim Lahey's method since first trying it out last year. It's so easy to make and there's so many possibilities.

This time a 1/4 cup of rolled oats found their way into this bread simply because that was all that was left in the tin and I wanted to finish it. I have no idea if the oats were responsible, but this loaf seemed moister to me than the previous ones (and the grain was finer), but I also used a smaller baking dish.

I was using a Le Creuset cast iron dutch oven for this which really is ideal, however I bake everything in a counter top convection oven and noticed the lid was getting scratched because it was barely fitting into the oven. I purchased a smaller ceramic dutch oven (2 quarts) the other day primarily for baking this bread. This smaller size created a rounder and fuller loaf; I was quite pleased with the result. 

Saturday, December 25, 2010

Daring Baker Challenge, Dec. 2010; Christmas Stollen


HAPPY HOLIDAYS!
The 2010 December Daring Bakers’ challenge was hosted by Penny of Sweet Sadie’s Baking. She chose to challenge Daring Bakers’ to make Stollen. She adapted a friend’s family recipe and combined it with information from friends, techniques from Peter Reinhart’s book.........and Martha Stewart’s demonstration.

I decided to make the traditional loaf shaped stollen and I filled mine with a piece of marzipan. I just couldn't imagine making one without that. I replaced half the cinnamon with cardamon and increased the amounts of raisins, dried sour cherries (in place of glacé cherries) and toasted slivered almonds to replace the mixed peel which I'm not entirely fond of. I do like homemade peel, but didn't have the time to make any this year.

This recipe was quite good compared to the many stollen I have sampled over the years.

Stollen Wreath

Makes one large wreath or two traditional shaped Stollen loaves. Serves 10-12 people

Ingredients

¼ cup (60ml) lukewarm water (110º F / 43º C)
2 packages (4 1/2 teaspoons) (22 ml) (14 grams) (1/2 oz) active dry yeast
1 cup (240 ml) milk
10 tablespoons (150 ml) (140 grams) unsalted butter (can use salted butter)
5½ cups (1320 ml) (27 ozs) (770 grams) all-purpose (plain) flour (Measure flour first - then sift- plus extra for dusting)
½ cup (120 ml) (115 gms) sugar
¾ teaspoon (3 ¾ ml) (4 ½ grams) salt (if using salted butter there is no need to alter this salt measurement)
1 teaspoon (5 ml) (6 grams) cinnamon
3 large eggs, lightly beaten
Grated zest of 1 lemon and 1 orange
2 teaspoons (10 ml) (very good) vanilla extract
1 teaspoon (5 ml) lemon extract or orange extract
¾ cup (180 ml) (4 ¾ ozs) (135 grams) mixed peel (link below to make your own)
1 cup (240 ml) (6 ozs) (170 gms) firmly packed raisins
3 tablespoons (45ml) rum
12 red glacé cherries (roughly chopped) for the color and the taste. (optional)
1 cup (240 ml) (3 ½ ozs) (100 grams) flaked almonds
Melted unsalted butter for coating the wreath
Confectioners’ (icing) (powdered) sugar for dusting wreath

Note: If you don’t want to use alcohol, double the lemon or orange extract or you could use the juice from the zested orange.

Directions:

Soak the raisins
In a small bowl, soak the raisins in the rum (or in the orange juice from the zested orange) and set aside. See Note under raisins.


To make the dough

Pour ¼ cup (60 ml) warm water into a small bowl, sprinkle with yeast and let stand 5 minutes. Stir to dissolve yeast completely.
In a small saucepan, combine 1 cup (240 ml) milk and 10 tablespoons (150 ml) butter over medium - low heat until butter is melted. Let stand until lukewarm, about 5 minutes.
Lightly beat eggs in a small bowl and add lemon and vanilla extracts.
In a large mixing bowl (4 qt) (4 liters) (or in the bowl of an electric mixer with paddle attachment), stir together the flour, sugar, salt, cinnamon, orange and lemon zests.
Then stir in (or mix on low speed with the paddle attachment) the yeast/water mixture, eggs and the lukewarm milk/butter mixture. This should take about 2 minutes. It should be a soft, but not sticky ball. When the dough comes together, cover the bowl with either plastic or a tea cloth and let rest for 10 minutes.
Add in the mixed peel, soaked fruit and almonds and mix with your hands or on low speed to incorporate. Here is where you can add the cherries if you would like. Be delicate with the cherries or all your dough will turn red!
Sprinkle flour on the counter, transfer the dough to the counter, and begin kneading (or mixing with the dough hook) to distribute the fruit evenly, adding additional flour if needed. The dough should be soft and satiny, tacky but not sticky. Knead for approximately 8 minutes (6 minutes by machine). The full six minutes of kneading is needed to distribute the dried fruit and other ingredients and to make the dough have a reasonable bread-dough consistency. You can tell when the dough is kneaded enough – a few raisins will start to fall off the dough onto the counter because at the beginning of the kneading process the dough is very sticky and the raisins will be held into the dough but when the dough is done it is tacky which isn't enough to bind the outside raisins onto the dough ball.
Lightly oil a large bowl and transfer the dough to the bowl, rolling around to coat it with the oil. Cover the bowl with plastic wrap.
Put it in the fridge overnight. The dough becomes very firm in the fridge (since the butter goes firm) but it does rise slowly… the raw dough can be kept in the refrigerator up to a week and then baked on the day you want.


I shaped mine into the traditional loaf with a strip of marzipan in the middle - this recipe makes 2 loaves.

Shaping the Dough and Baking the Wreath

1. Let the dough rest for 2 hours after taking out of the fridge in order to warm slightly.
2. Line a sheet pan with parchment paper.
3. Preheat oven to moderate 350°F/180°C/gas mark 4 with the oven rack on the middle shelf.
4. Punch dough down, roll into a rectangle about 16 x 24 inches (40 x 61 cms) and ¼ inch (6 mm) thick.

Starting with a long side, roll up tightly, forming a long, thin cylinder.

Transfer the cylinder roll to the sheet pan. Join the ends together, trying to overlap the layers to make the seam stronger and pinch with your fingers to make it stick, forming a large circle. You can form it around a bowl to keep the shape.

This was before I pinched it together
Using kitchen scissors, make cuts along outside of circle, in 2-inch (5 cm) intervals, cutting 2/3 of the way through the dough.

Twist each segment outward, forming a wreath shape. Mist the dough with spray oil and cover loosely with plastic wrap.

Proof for approximately 2 hours at room temperature, or until about 1½ times its original size.
Bake the stollen for 20 minutes, then rotate the pan 180 degrees for even baking and continue to bake for 20 to 30 minutes. The bread will bake to a dark mahogany color, should register 190°F/88°C in the center of the loaf, and should sound hollow when thumped on the bottom.
Transfer to a cooling rack and brush the top with melted butter while still hot.
Immediately tap a layer of powdered sugar over the top through a sieve or sifter.
Wait for 1 minute, then tap another layer over the first.
The bread should be coated generously with the powdered sugar.
Let cool at least an hour before serving. Coat the stollen in butter and icing sugar three times, since this many coatings helps keeps the stollen fresh - especially if you intend on sending it in the mail as Christmas presents!
When completely cool, store in a plastic bag. Or leave it out uncovered overnight to dry out slightly, German style.

The stollen tastes even better in a couple of days and it toasts superbly…. so delicious with butter and a cup of tea….mmmmm
Storage
The more rum and the more coatings of butter and sugar you use the longer it will store.
The following is for the recipe as written and uses the 45 mls of rum and two coatings of butter and icing sugar
1. Stollen freezes beautifully about 4 months
2. The baked stollen stores well for 2 weeks covered in foil and plastic wrap on the counter at room temperature and
3. One month in the refrigerator well covered with foil and plastic wrap.

Additional Information:

Here is a link to recipes to make your own candied citrus peel
http://www.harvestwizard.com/2006/12/candied_citron_recipe.html
http://video.about.com/candy/Make-Candied-Citrus-Peel.htm

http://userealbutter.com/2007/10/09/candied-orange-peels-recipe/

Kneading Bread
http://www.youtube.com/watch?v=dWj8oHMPFm0

Martha Stewart’s wreath
http://www.marthastewart.com/recipe/stollen-wreath-bread-with-mrs-kostyra

Friday, May 28, 2010

Corn & Flour Tortillas

(about 8 large or 12 small tortillas)


I couldn't decide whether to make corn or flour, so I ended up combining the flours.
1 cup unbleached flour, perhaps a tbsp or so more
1 cup masa harina
1/4 cup lard, shortening or unsalted butter (1/2 stick)
1 tsp baking powder
1 tsp salt
3/4 - 1 cup warm water

Place 1 cup flour, masa harina, lard, shortening or butter, baking powder and salt in a bowl of a food processor fitted with the dough blade. Pulse a few times to combine the ingredients.

Pour about 3/4 of a cup of warm water down the chute with the motor running.

Add either a bit more water or flour until you have a soft dough ball which leaves the sides of the bowl cleanly. Run another minute or so, or remove the dough and knead it a bit. Cover and allow to rest for about 30 minutes.

Divide the dough into 8 to 12 balls. Either roll each one out or flatten them in a tortilla press between 2 pieces of parchment paper.

Cook the tortillas, one at a time in a hot ungreased skillet, about 1-2  minutes on each side. Adjust the temperature if necessary to keep them from burning.

Saturday, May 1, 2010

No Knead Bread, Kalamata Olive Sourdough

(about 1 lb loaf)


I started this dough the same day I finished my first no knead loaf, and changed up a few ingredients. I couldn't wait to try this with Kalamata olives. The occasional olive bread I bring home costs a small fortune, and I had the feeling this would be as good if not better.

It was as good, but with more olives!

Adapted from Jim Lahey's Recipe
1/3 cup organic rye flour
2 2/3 - 3 1/3 cups unbleached flour
1/4 tsp dry yeast
1 1/2 tsp salt
1 1/2 cups spring water, aprox.
2 tbsp olive oil
2/3 cup Kalamata olives, pitted

Combine the rye flour, 2 2/3 cups unbleached flour, yeast and salt. Make a well in the centre and add the water and olive oil. Stir until well combined. Cover the top with a cheese cloth and set in a draft free place in a room with a temperature of about 70-75°F. for about 8-12 hours.

The dough should have risen and look bubbly. Stir it down, cover and leave at room temperature for another 8-12 hours.
 
Repeat this process for 2-3 days, twice a day. The longer you delay baking this dough the more sour it will become. I went to three days this time, and loved the result.
 
On the night before you plan to bake your loaf. Add a couple of tablespoons of water and up to 1/2 cup of flour (depending on how firm a dough you would like) . Stir this in well to combine. I thought this might help "feed" the dough. I wasn't sure if that was necessary, but I didn't think it would hurt and I wanted a slightly firmer dough than I had on my first attempt. I really ought to purchase Jim Lahey's book; I imagine it might be a good read.

Sprinkle a small amount of flour onto a piece of baking parchment paper. I placed my paper into a bowl. Add the Kalamata olives to the dough and stir down. The dough will probably have a pronounced sourdough smell at this point.

Sprinkle a small amount of flour over the dough. Flour your hands and place the dough onto the parchment paper. Shape the dough into a ball, tucking the ends underneath it. Cover it with the cheesecloth and allow to rise 2-3 hours, or until it looks like it's doubled in volume.

Place a Le Creuset cast iron dutch oven (this seems to work best from what I've read) into your oven and turn on the heat to 450-500°F. (My Breville counter top convection oven will only allow me to go to 450°, but the bread turned out fine).

When the pot is good and hot, carefully pull it out and place the parchment paper with the dough into pot and cover with lid. Bake for about 25 minutes.

Remove the lid and bake an additional 15-20 minutes or until the crust is a nice brown OR turn on the broiler for 3-5 minutes until the top of the loaf is nicely browned; this is what I did. In all honesty, I was a bit worried baking it any longer than that because the loaf seemed done to me, and I was concerned about drying it out.

Allow the loaf to cool at least an hour before cutting into it.

Wednesday, April 28, 2010

No Knead Sourdough Cheese Bread, adapted from Jim Lahey's Recipe

(about a 1 lb loaf)


My curiosity got the better of me when I kept coming across images of no knead bread based on Jim Lahey's recipe. When I finally decided to give it a try, I understood why people were raving about this bread. This is possibly the best loaf of bread I have ever made at home. It had a wonderful crust, chewy texture, and this one had a nice sour tang to it because I extended the time, to over 48 hours.

It will be a while before I try anything else. I'd like to make this a few more times; with  kalamata olives... prosciutto and caramelized onions....  roasted garlic and rosemary....   I might swap out some of the water for olive oil, or yogurt.. lots of choices.

Adapted from Jim Lahey's Recipe
2 tbsp organic rye flour
2 3/4 - 3 1/3 cups unbleached flour
1/4 tsp dry yeast
1 1/2 tsp salt
1 1/2 cups spring water

2/3 cup Swiss cheese, cut into 1/2" cubes

olive oil for coating


(Day 1, morning) Combine the rye flour, 2 3/4 cup unbleached flour, yeast and salt in a large glass bowl. Make a well in the centre and  add the water. Stir until well combined. Cover the top with a cheese cloth and set in a draft free place in a room with a temperature of about 70-75°F. for about 12-14 hours.

(Day 1, evening) The volume should have doubled and the dough should look bubbly. Stir the mixture down, cover with the cheese cloth and allow to sit another 9-12 hours or so.

(Day 2, , morning) Again the dough will have doubled and look quite bubbly.  Stir down and cover with the cheeseckoth and leave sit 9-12 hours or so.

(Day 2, evening) Stir down and stir in 1/4 cup of unbleached flour. (I did this at this point because the dough was beginning to look a bit soupy). Cover with the cheesecloth and allow to sit another 9-12 hours or so.

(Day 3) Sprinkle a small amount of flour onto a piece of baking parchment paper. Add the cheese cubes to the dough and stir down. The dough will probably have a pronounced sourdough smell at this point.

Sprinkle a small amount of flour over the dough. Flour your hands and place the dough onto the parchment paper. Shape the dough into a ball, tucking the ends underneath it. Cover it with the cheesecloth and allow to rise 2-3 hours, or until it looks like it's doubled in volume.

Brush the top lightly with olive oil.

Place a Le Creuset cast iron dutch oven (this seems to work best from what I've read) into your oven and turn on the heat to 450-500°F. (My Breville counter top convection oven will only allow me to go to 450°, but the bread turned out fine).

When the pot is good and hot, carefully pull it out and place the parchment paper with the dough into pot and cover with lid. Bake for about 25 minutes.

Remove the lid and bake an additional 15-20 minutes or until the crust is a nice brown OR turn on the broiler for 3-5 minutes until the top of the loaf is nicely browned; this is what I did. In all honesty, I was a bit worried baking it any longer than that because the loaf seemed done to me, and I was concerned about drying it out.

Allow the loaf to cool at least an hour before cutting into it.

Saturday, April 24, 2010

Braided Sweet Raisin Bread

(1 loaf)

This bread is wonderful with marmalade, honey or anything sweet. If there's anything left over, it makes a nice french toast.

My mum will probably read this and ask me why I added the baking soda to a yeast bread, (she told me recently she has an aversion to the stuff). All I'll be able to tell her, it's habit. I usually add a bit of baking soda whenever I use buttermilk or something acidic to neutralize the acid.

I make this bread in an 11 cup food processor, with minimal kneading by hand.

bread
1 cup buttermilk, warmed, but not too hot
1 1/2 tsp dry yeast
3 tbsp sugar
3 - 3 1/2 cups unbleached bread flour
1/2 cup raisins*,  see note at bottom
1/2 tsp baking soda
2 tsp lemon zest,  minced
1/2 tsp ground cardamon
1/4 cup butter, softened

1 large egg

glaze (optional)
1 egg, beaten
1 tbsp water
1  tbsp coarse sugar

Add the yeast and sugar to the buttermilk and let stand for about 5 minutes until the yeast has dissolved.

Place 3 cups of flour (to start) in the bowl of your food processor fitted with the dough blade. Add the raisins, baking soda, lemon zest and cardamon. Pulse a few times to combine.

Add the buttermilk mixture, butter and egg. Run the food processor with the chute open. If the dough doesn't leave the sides of the bowl, then slowly add a tablespoon of flour at a time until it barely does. I try to add the least amount of flour so that the dough is on the "wet" side.

Run the food processor an additional 3 minutes. The dough should feel soft and slightly sticky. Butter your hands and knead on a very lightly floured surface for another 3 minutes until it looks smooth and elastic.

Place onto a buttered dish, cover and allow to double in size; about 1 - 1 1/2 hours.

Punch down, and divide into 3 equal pieces. Roll out into ropes and braid, tucking in both ends.

Allow to rise for at least 30 minutes; preferably longer if you want it to double in size. I'm usually impatient at this point and don't mind a denser loaf.

Preheat oven to 350°F.

Combine the egg and water and brush over the top of the loaf. Sprinkle with the sugar.

Bake for about 30-40 minutes or until it sounds hollow when tapped.

* I add the raisins at the very beginning and they do break up while the dough gets it's workout in the food processor. I like my bread this way. If you prefer your raisins to remain whole, then don't add them until you remove the dough from the food processor. Work them while you are kneading.

Sunday, March 28, 2010

Skillet Naan

(8-10 pieces)


I just had to make fresh naan to go with the butter chicken. This became an Indian themed weekend.

2/3 cup warm water
2 tsp sugar
2 tsp dry yeast
3 1/2 - 4 cups unbleached flour
1 tsp baking powder
1/2 cup greek style plain yogurt, (I used some leftover herbed yogurt)
1 egg

ghee or olive oil for the skillet

Combine the water, sugar and yeast. Set aside for 5 minutes.

Add 3 1/2 cups of flour (to start) and baking powder to the bowl of a *food processor fitted with a dough blade. Pulse a few times to combine. Add the water and yeast mixture as well as the yogurt and egg. Pulse a few times.

If the dough remains in clumps, then add tiny amounts of water until you get a ball. If on the other hand the dough is very gooey and sticky, add small amounts of flour until you get a ball. I like my dough to be very soft and slightly sticky to the feel, yet still have the ability to pull away from the bowl of the food processor.

Process the ball for about 2-3 minutes. Place into a greased bowl, cover loosely and set aside for about 1-1 1/2 hours or until it has doubled in volume.

Punch down and divide into 8-10 pieces. Roll each one into an oval about 1/4" thick.

Heat up a non-stick skillet over medium to medium low heat and coat it with a small amount of ghee or olive oil.

Place one circle of dough at a time and cook for about 1-2 minutes on each side, or until both sides are lightly browned.

*If your food processor is on the smallish side, then half the recipe. Use the entire egg and add a bit extra flour to make up for that.