Showing posts with label sauce. Show all posts

Sunday, May 22, 2016

Rebecca's Jerk Marinade

(enough to marinate 2 lbs meat, poultry or seafood)


Some of the best recipes I have come across are those that get passed along. Several months ago a friend in Toronto, emailed this terrific recipe to me. She had received it from her friend, Rebecca.

I tried this with chicken and it turned out great!


Although I have a 12 cup food processor, I wasn't able to fit everything in at once. But, I didn't have to do it in batches either. I just rearranged the order of the ingredients. I also added the zest from the lime.

1 small onion, cut up
4 cloves garlic, peeled
1 - 2 inch piece fresh ginger, peeled and cut into several pieces
3 tsp salt
2 tsp dried thyme
2 tsp allspice
1 tsp freshly cracked black pepper
1/2 tsp nutmeg
1/4 tsp cinnamon
1/8 tsp ground cloves
1/4 cup fresh lime juice
zest from one lime
3 tbsp soy sauce
2 tbsp olive oil
1 tbsp brown sugar
2 jalapeno peppers, seeded and cut up
1 bunch cilantro
1 bunch parsley
1/4 cup chopped green onion


Place the onion, garlic, ginger, salt, thyme, allspice, pepper, nutmeg, cinnamon, cloves, lime juice, lime zest, soy sauce, olive oil and brown sugar into the bowl of a 12 cup food processor. If you are using something smaller, you might have to do this in batches. Pulse several times until the mixture is fine.


Add the jalapeno peppers, cilantro, parsley and green onion. Pulse until you have a coarse paste.

This can be stored in the refrigerator for up to two months if placed in a non reactive container and lid.


Friday, April 22, 2016

Italian Sausage Pasta Sauce

(about 4 servings)


This is an easy and delicious pasta sauce. It's flavor depends primarily on the sausage you are using. I'm very fortunate to live near a butcher who offers a decent choice of well seasoned sausages.

If the fat content of your sausage is high, you might consider preparing the sauce the day ahead and refrigerating it overnight. That way you can easily remove the hardened excess fat from the sauce the next day.

1 tbsp olive oil
2-3 cloves garlic, sliced
1 lb bulk (or casings removed) sweet Italian sausage 
1 28oz can whole plum tomatoes, roughly chopped
2-3 pinches red hot chili flakes
1/2 cup grated Parmesan cheese
fresh chopped parsley, to serve

4 servings of your favorite dried pasta

Heat the olive oil in a large saucepan over medium heat. Add the garlic and cook until the garlic is lightly browned. Remove the garlic from the pan and set aside.

Crumble the sausage meat and fry until browned in the garlic flavored oil. Add the tomatoes, reserved garlic and the red hot chili flakes. Simmer gently until the sauce begins to thicken; about 20-25 minutes.


Stir in the Parmesan cheese and keep warm.

Prepare the pasta according to the directions on the package.

Divide the pasta among 4 plates and top each with the sauce. Sprinkle with the chopped fresh parsley and serve.

Sunday, February 28, 2016

Beef Shank Ravioli with Pea Sauce

(about 4-5 servings)


Recently a friend gave me a wonderful cookbook, Odd Bits: How to Cook the Rest of the Animal, by Jennifer McLagan ©2011. It makes for great reading offering up bits of historical and anecdotal details relating to offal, in addition to some really interesting recipes.

Unfortunately these days it's difficult to find a lot of the items covered in this book. When was the last time you came across lung, spleen, heart or testicles? Heck, just a few years ago it took me nearly a month to get my hands on some kidneys in Dallas. Kidneys for crying out loud!!! I spent days on the phone calling butchers in both Fort Worth and Dallas until I found one who carried them. I haven't really come across interesting "odd bits" since leaving Toronto, where nearly 35 years ago those items were common place in butcher shops in Kensington Market or along Bloor street. I remember a Hungarian restaurant that offered sour lung on its menu and several butchers that sold the spongy looking organ in their shops. I had no idea that along with udders, the USDA doesn't consider lung suitable for human consumption. Perhaps with the renewed interest in head to tail cooking, those items might reappear some day.


This recipe for beef shank ravioli was inspired by a recipe from Odd Bits, for deconstructed oxtail ravioli with peas. I have seen oxtail at my local butcher, but they don't always have them so I brought home a piece of beef shank instead. I braised the meat until it fell apart in a sauce which was similar to Jennifer McLagan's. Aside from swapping out the meat, I had to make a few more changes because I didn't have all of the ingredients. I didn't start off with a proper mirepoix as I forgot to bring home celery, and I didn't have access to chervil, so I used parsley instead. I also added some fresh marjoram.

This is a time intensive recipe which I broke down over three days. I prepared the filling the first day and stuffed the ravioli on the second. On the third day I made a delicious pea sauce to go with the flavorful beef shank ravioli.

filling
1 tbsp olive oil
salt and freshly cracked black pepper
3/4 lb boneless beef shank
1 medium yellow onion, finely chopped
2 carrots, finely chopped
1 1/2 cups dry red wine
1 1/2 tsp low sodium organic Better than Bouillon Beef Base
4 sprigs parsley
2 sprigs marjoram
1/2 tsp dried thyme
2 cloves garlic, chopped
1 bay leaf

Heat the oil in a large pot or skillet with a tight fitting lid over medium-high heat. Cut apart the beef shank into four or five pieces and generously season with salt and pepper.

Fry the meat until both sides have nicely browned; the middle will still be raw. Remove the meat and place onto a plate. Set aside.

Add the onion and carrots to the pot or skillet. Reduce the heat and stir the vegetable mixture in order to scrape up the browned bits. Cook until the vegetables have softened and begin to caramelize.


Stir in the wine, Better than Bouillon, parsley, marjoram, thyme, garlic and bay leaf. Return the meat and any juices that have formed on the plate.

Reduce the heat to low, cover the pot or skillet and braise for about 3 1/2 hours or until the meat is fork tender.  Halfway through, turn the meat over and add a small amount of water if the mixture seems too dry.

Remove the lid and continue to cook until the sauce thickens. You want most of the liquid to have evaporated, yet still have the meat remain nice and moist. Taste and adjust the seasoning with salt and pepper, if needed. Remove from heat.

Cool, remove the parsley and marjoram sprigs and bay leaf. Shred the meat with a fork. At this point the filling can be wrapped and refrigerated for several days until you are ready to prepare the dough and stuff the ravioli.

Refrigerate the filling for at least an hour before stuffing the ravioli. This helps firm it up.

dough
2 1/4 cups unbleached flour
2-3 large eggs
water, as needed

Combine the flour and eggs in a large bowl or a food processor. Add enough water until you have a soft dough. If you are using the food processor, then run the motor until the dough forms into a ball. If you are doing this by hand, then knead it a few times once it all comes together.

Cover with plastic wrap and set aside for 30-40 minutes.


Remove a small piece of dough and roll it out thin into a rectangle on a lightly floured surface. Repeat with another piece of dough about the same size and set aside. (I used a pasta machine and put it through a setting of 5 or 6 (out of 9).) If you are rolling it out by hand, this would roughly equate to about 1/12 or so of an inch. I had some pasta dough left over, so don't worry if you can't get it that thin.

Place heaping teaspoonfuls of filling about 1/2 an inch apart on one of the pasta sheets. Lightly spritz with water or brush water around the filling. Place the second sheet of dough over the first and gently press down to seal and remove as much air as possible.

Cut the ravioli apart with a pastry or pizza cutter. Place the finished ravioli on a floured surface and repeat until you have used up all of the dough and filling.

At this point you can freeze the ravioli by placing them on a parchment paper lined cookie sheet in a single layer, not touching and freezing them for at least 3 hours.

sauce
1/2 stick butter
1 clove garlic, chopped
1 cup peas
1 tbsp parsley, chopped
1-2 green onion, sliced
1/2 tsp fresh lemon zest
2 tsp freshly squeezed lemon juice, or more to taste
salt and freshly cracked pepper, to taste

Melt the butter over medium heat until it begins to froth and then add the garlic. Stir for about 30 seconds, then add the peas. Lower the heat a touch and cook, stirring for about two minutes.


Stir in the parsley, green onion, lemon zest and lemon juice. Season with salt and pepper and keep warm.

Bring a large pot of lightly salted water to a boil. Reduce the heat a bit and drop in the ravioli. Cook for about 4-5 minutes (add 2 minutes if they were frozen).

Serve immediately with the pea sauce.

Saturday, May 30, 2015

Poutine

(about 3 servings)


These days poutine is more readily available across Canada. When I was younger, it was difficult to find outside of Québec. I first encountered it in my early 20's on a trip to Montréal. It was love at first bite. I recall the stares followed by laughter whenever I ordered it because I would ask for,  "Une ´poo-teen`, s'il vous plaît".

Essentially poutine is a serving of (deep fried) french fries sprinkled with fresh cheese curds and then covered with gravy. The gravy often appears to be thick and enhanced with Bisto (my mum returned with two boxes of the stuff the last time we visited Vancouver Island). It all depends on where, and who is making it. Nevertheless, poutine always seems to taste better in Québec.


Recently I visited the Tillamook Cheese Factory in northern Oregon. I brought back a bag of cheese curds which were delicious, although they didn't "squeak" like the ones in Canada do.

gravy (about 1 cup)
1 tbsp butter
1 medium yellow onion, chopped
1 1/2 cups water
2 tsp Organic Better Than Bouillon Low Sodium Beef Base
1 tsp apple cider vinegar
a few grinds of black pepper
1 pinch dried thyme
1/4 cup dry red wine
1 tbsp (add a tsp or two more if you prefer a thicker gravy) all purpose unbleached flour

Place a skillet over medium heat and add the butter. When the butter begins to froth, stir in the onions, then lower the heat a touch. Cook,stirring from time to time for about 30 minutes or until the onions are an even medium brown.

Stir in the water, beef base, vinegar, black pepper, and thyme. Simmer gently for about 10-15 minutes.


Strain the gravy though a sieve and press as much of the soft onion through as possible. Set aside. (You'll add the wine and flour later).

oven fries
1 1/4 lb potatoes, cut into 1/3 inch thick matchsticks (russets will be somewhat crispier; I used Yukon golds)
salt
1 tbsp olive oil
a few grinds of pepper

Preheat oven to 450°F.

Sprinkle the potatoes with salt and allow to sit for about 8-10 minutes. Dry the potatoes with a towel as best you can.

Drizzle the potatoes with olive oil and sprinkle with pepper. Toss until they are evenly coated.

Place the potatoes in a single layer on a cookie sheet (lined with parchment paper for easier cleanup).

Bake for about 10-15  minutes or until they have browned nicely.


assembly
2/3 cup cheese curds

Before you remove the potatoes from the oven, whisk together the red wine and flour. Add this to the gravy and set over medium heat.

Bring the mixture to a gentle simmer and cook for about 2 minutes. Remove from heat and keep warm.

Remove the "fries" from the oven when done and place into a pasta type dish. Sprinkle the cheese curds evenly over the fries and then pour the gravy over both. Serve immediately.

Sunday, February 8, 2015

Chicken in Creamy Tarragon Wine Sauce

( 4 servings)


A month or so ago I was reading a book and one of the characters in it prepared a dinner with chicken in mascarpone, white wine and tarragon sauce. It sounded delicious so I googled the recipe and came across one by the author, Rachel Abbott. The link for this recipe was from her book Sleep Tight which I adapted slightly. Sadly, she has since removed the link.

For several weeks I kept checking the market for fresh tarragon and when I finally asked someone about it, I was told they only sold it during the summer months. A few days ago I was in town and found a bunch of fresh organic tarragon. I grabbed a few chicken breasts, but decided not to get the marscapone. I still had some sour cream at home.

This chicken dish was amazing! It was easy to prepare and will probably become one of my go-to dishes. The entire meal of steamed green beans, rice and the chicken took about 35 minutes to make.

4 small skinless and boneless chicken breasts, or 2 huge breasts (about 5-6 oz per portion)
salt and freshly cracked pepper
small amount of butter for sauteing
1 large clove garlic, finely chopped
1 medium onion, chopped
1 cup dry white wine
1 cup chicken broth
3 tbsp fresh tarragon, chopped
1 tsp fresh lemon zest, finely chopped
3 tbsp sour cream
1 tsp *tapioca flour

chopped fresh tarragon for garnish

Place the chicken breasts between parchment paper or plastic wrap and pound gently with a mallet until they are an even thickness. The breasts I picked up were huge, so I divided them by slicing them through the middle. Season both sides with salt and pepper right before you put them into the skillet.

Heat up a large skillet over medium-high heat (large enough to hold all of the chicken in one layer). Add about 2 teaspoons butter and when it begins to foam add the chicken and fry for about 2-3 minutes per side or just until both sides are lightly browned. It's not necessary to cook the chicken all the way through. Remove the chicken and place onto a plate. Set aside.

Lower the heat and add another 2 teaspoons of butter to the skillet (do not wipe the skillet clean beforehand). Add the garlic and fry until fragrant; about 30 seconds. Stir in the onions and saute until they are soft and translucent; about 5 minutes.


Pour in the wine and add the tarragon and lemon zest. Increase the heat and briskly simmer the mixture until the liquid has reduced by about half; about 6-7 minutes.

Pour in the chicken broth and reduce the heat so the mixture gently simmers.

Stir together the sour cream and the tapioca flour. Add a spoonful or two of the hot liquid to temper the sour cream, then add it all back into the skillet. *The small amount of tapioca flour prevents the sour cream from curdling after it's mixed into the liquid and continues to simmer.

Place the reserved chicken (and any accumulated liquid back) into the sauce and cook (uncovered) for about 7-10 minutes or until the chicken is cooked through. Check and adjust the seasoning, if needed, of the sauce. If the sauce becomes too thick, then stir in a small amount of hot water.

To serve, divide and spoon the sauce onto plates. Place the chicken pieces over the sauce. Garnish with chopped fresh tarragon.

Sunday, July 27, 2014

Chunky Fresh Loganberry Coulis

(about 5 cups sauce)

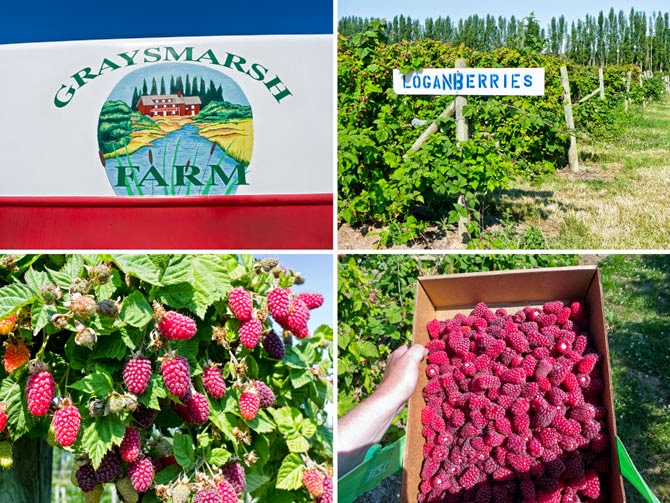
My mum lives very close to a large berry farm on the Olympic Peninsula. You can pick your own or grab boxes of already picked berries. At the moment they have a nice selection of raspberries, blueberries, loganberries and boysenberries.


Last week I headed to the farm for my first time and picked over 7 pounds of loganberries. I hadn't planned on that many and I mistakenly picked the ripest berries. By the time I got them home some had already begun to get mushy.

They weren't going to last much longer, so I washed and froze about two thirds of them. The rest of the loganberries became a tasty coulis. A delicious dessert sauce, great over ice cream, yogurt, crepes or waffles.

6-7 cups fresh loganberries
1/4 -2/3 cup agave syrup or honey, to taste

Pick over the berries and wash them in water.


Place about half of the loganberries into the food processor with 1/4 cup of sweetener to start. Process until you have a sauce. Taste and add more sweetener if the coulis is too tart. Pulse a few more times. Strain the sauce through a sieve, if desired. Loganberries have less seeds than raspberries. I left them in.

Stir in the remaining berries. Leave the whole, or pulse once or twice to chop them up a bit. Store in the refrigerator for a few days or freeze.

Sunday, June 29, 2014

The Red Rooster Cafe's Blue Cheese Dressing


Blue Cheese Dressing recipe from the front page of The Red Rooster menu.
This week I'm staying at a ranch near Cottonwood, AZ which is about 20 minutes southwest of Sedona. There are a lot of good wineries and restaurants in this picturesque area.

The Red Rooster Cafe is located on the historic Main Street in Cottonwood. I enjoyed a memorable mini burger (3oz patty of grass fed, organic beef) served on a baguette with a layer of a delicious sun-dried tomato cream cheese spread, as well as a garden salad with a really tasty homemade Blue Cheese Dressing. I was pleased that they printed the recipe for the dressing on the front page of their menu.


Sunday, February 2, 2014

Casarecce with Gorgonzola and Walnuts

(3-4 servings)


I don't make this delicious pasta dish as often as I would like because it's very rich, but the other day while I was at the cheese counter my cravings got the better of me.

This is a very quick and easy meal to prepare.

1/2 lb dry casarecce
1 tbsp butter
2 large cloves garlic, minced or pressed
1 -2 tbsp fresh sage, finely sliced
1 pinch cayenne
1/2 cup milk
2 tbsp heavy cream
5 - 6 oz Dolce Gorgonzola, cut into small chunks
salt, to taste
1/4 cup chopped walnuts, toasted

Bring a pot of lightly salted water to a boil. Add the casareccia and cook the pasta (al dente) according to the instructions on the package.

Meanwhile, melt the butter in a saucepan (large enough to hold the pasta) over a medium-low flame. Add the garlic and saute for about one minute or until it becomes a golden brown. Take care it doesn't burn. Stir in the sage and cayenne and cook another minute or so.


Stir in the milk and bring to a light simmer for about 4-5 minutes or until it has reduced by about one half. Stir in the cream. Bring the sauce back up to a simmer and stir in the Gorgonzola. Remove from heat and continue stirring until the cheese has completely melted. Taste and add salt, if needed. (Keep warm if the pasta isn't ready yet.)

Add the hot drained pasta to the sauce and toss until it's evenly coated. Divide between three or four plates. Sprinkle the toasted walnuts over each serving.

Enjoy!


Saturday, September 21, 2013

Savory Pan Fried Pork Tenderloin

(about 2-3 servings)


This is an easy way to prepare pork tenderloin, resulting in juicy pieces of meat covered in a great tasting sauce.

a few grinds of freshly cracked pepper
a few pinches ground cayenne
1 lb pork tenderloin
3 tbsp soy sauce
3 tbsp water
1 tbsp cider vinegar
1-2 cloves garlic, minced or pressed
2 tsp honey
2 tsp coconut oil or a high temperature oil

Sprinkle the pork tenderloin evenly with the pepper and cayenne. Don't add salt as the finished sauce will be salty enough. Set aside.

In a small bowl combine the soy sauce, water, vinegar, garlic and honey. Set aside.

Heat the oil in a skillet over a high flame. Fry the pork tenderloin, turning it from time to time until it's evenly browned all over; about 5-6 minutes.

Lower the flame to medium-low, cover the pork loosely with  a piece of foil and fry for about *7-10 minutes. Turn the meat over and cover with foil again and fry for another 7-8 minutes. At this point start checking the internal temperature of the thickest portion of the tenderloin. You want it to reach **just shy of 145°F. Remove to a warmed plate and cover with the foil.


*The cooking times will vary, depending on the temperature of your pork tenderloin when you begin. Mine took about 30 minutes in total because it was practically straight out of my refrigerator and still cold. It will cook much faster if it's room temperature, so adjust accordingly.

**145°F is the lowest recommended temperature for cooked pork resulting in a juicy piece of meat with a slightly pink centre. You will be placing the pork onto a warmed plate and covering it with foil. The pork will continue to heat up a bit as it sits there.

Pour the sauce mixture into the skillet and stir up the browned bits into the sauce as it heats up. Bring to a strong simmer and cook for about 30-45 seconds. Remove from heat.

Cut the the pork tenderloin into slices and place onto a serving plate. Spoon the sauce evenly over the cut meat. Serve.

Sunday, May 19, 2013

Gluten Free Zucchini Patties with Curry Sauce

(2 servings)


These patties turned out to be a great way to use up the leftover zucchini from yesterday. You can easily double this recipe if desired.

I served these zucchini patties with the creamy curry sauce for lunch.

2 packed cups grated zucchini, about 14oz
1 tsp salt
2 large eggs
2-3 tbsp rice flour
2-3 tbsp coconut flour
1 green onion, sliced
1 small clove garlic, minced
1 tsp minced ginger
freshly cracked pepper

2 tbsp sour cream
2 tbsp plain yogurt
1 tsp curry powder, or to taste

1 tbsp olive or coconut oil

Toss together the zucchini and salt and set aside for about an hour.


Wring out as much liquid as you can from the zucchini.

Whisk together the eggs and 2 tablespoons each of the rice flour and coconut flour. Add the zucchini, green onion, garlic, ginger and cracked pepper. Stir until well combined. If the mixture seems too wet then sprinkle the remaining rice and coconut flour over the mixture and stir again. I used all six tablespoons of the combined flour. The mixture should have some substance but it will still be on the wet side. Set aside.


Heat the oil in a large skillet over medium heat.


While the oil is heating up stir together the sour cream, yogurt and curry powder. Set aside.

Divide the zucchini mixture to form 4 patties, scoop up and drop onto the hot skillet. Use a spoon to shape them, if needed. Fry for about 2 minutes on each side until they are golden brown.

Serve with the curry sauce.

Sunday, April 21, 2013

A Simple Frozen Banana Dessert


(2 servings)


A year or so ago I came across a posting about a single ingredient banana ice cream. I had forgotten about it until this weekend when I had a couple of very ripe bananas on my hands.

This is really simple if you have a food processor. It might work in a blender, but I haven't tried that. I made a chocolate coating for the ice cream and topped it with roughly chopped dry roasted cashews. Boy, was I amazed by how good this was! These bananas turned into the smoothest and creamiest ice cream ever. It was sweet enough and dairy free, and it really came down to just eating a banana or so.

If fat is an issue then don't bother with the chocolate coating or nuts. Bananas do contain a tiny amount of fat naturally. I looked it up, 1 g of fat in a 225 g serving.

banana ice cream
2-3 large very ripe bananas


chocolate coating
2 tbsp bittersweet or semisweet chocolate chips
1 tbsp virgin coconut oil (the kind for medium heat and solid in the jar)


4-5 dry roasted cashews, coarsely chopped

Peel the bananas and cut into slices. Place them inside a freezer bag and try to keep them in a single layer. Freeze overnight or until they are frozen solid.


Right before you remove the bananas from the freezer, make the chocolate coating.

Place the chocolate chips and coconut oil into a bowl. Set this over hot water or place it into the microwave and heat 10 seconds at a time until they begin to melt.


With either method, once most of the chocolate has melted about halfway or a bit more, remove it from the heat and continue to stir until the chocolate has completely melted. Set aside.


Remove the frozen bananas from the freezer and place the slices into the bowl of a food processor. Pulse until they break up and then continue to pulse until they form a ball.

Remove the top and scrape down the sides. Break up the ball and distribute it evenly around the bottom of the bowl. Replace the top and continue to pulse until the mixture is smooth and creamy.


Divide the ice cream between 2 bowls. Drizzle each with the chocolate coating (there's probably enough coating for 3 or 4 desserts; it hardens to a super thin shell the moment it hits the cold ice cream) and sprinkle each with the chopped nuts.

Enjoy.

Fast and Easy Paleo Recipes

Sunday, March 24, 2013

Cheese & Onion Enchiladas with Beef Chili Sauce


(4-5 servings)


My cheese and onion enchiladas aren't photogenic after I remove them from the oven, but they are tasty and I always look forward to eating them. I have no idea what restaurants do to make theirs look attractive.

1 tbsp olive oil
2 large yellow onions, chopped (about 1 1/2 lbs)

1 tbsp coconut oil or a high heat oil
1 lb lean ground sirloin
2-3 garlic cloves, minced
3 cups beef broth
2 tbsp concentrated tomato paste
2-3 tbsp chili powder, to taste
1 tsp ground cumin
1 tsp ground coriander
1/2 tsp oregano
3 tbsp masa harina or corn flour
salt, if needed

hot water
8-9 corn tortillas
the reserved and cooled sauteed onions
1/2 lb Queso Oaxaca or Monterey Jack cheese, shredded (about 2 cups)
1/4 lb cheddar cheese, shredded (about 1 cup)
1/2-1 jalapeno pepper, washed and thinly sliced

Heat the olive oil in a large non stick skillet over a medium flame and add the onions. Saute them, stirring from time to time until they are a nice golden hue; about 20 minutes.

Place the onions into a large mixing bowl and leave to cool.

Wipe out the skillet, set over a high flame and add the coconut oil.

When the oil is hot add the ground sirloin and fry, breaking it up with a wooden spoon until it has browned nicely.

Lower the heat and stir in the garlic. Cook for about a minute, then pour in the beef broth. Stir in the tomato paste, chili powder, cumin, coriander and oregano. Simmer the sauce for about 12-15 minutes, giving it a good stir once or twice.

Sprinkle the masa harina over the sauce and stir until everything is evenly combined. Simmer for another minute or two until the sauce has thickened. Check and see if it needs salt. Remove from heat.

Spoon a little more than half of the sauce into the bottom of a 9x13 inch casserole dish. Set aside.


Preheat oven to 350°F.

Fill a bowl or pan large enough to hold the tortillas with hot water; from the tap is fine.

Place two tortillas into the water at a time and leave for about a minute until they have softened.

While the first two tortillas are soaking in the water combine the two cheeses. Set aside about 1/4 cup of cheese and add the rest to the cooled onions. Toss to combine.

Fill each tortilla with about 1/8 of  the onion and cheese mixture. This will be a generous amount of filling. Place a few slices of jalapeno pepper over each one and roll up.

Place each enchilada into the casserole dish with the seam side facing down. Keep adding another tortilla to the water after you finish rolling one up, until they are all done. When all of them are in the casserole, spoon the remaining sauce evenly over the top and sprinkle the reserved cheese over that.

Bake for about 30-40 minutes or until the casserole is bubbling hot.

Remove from oven and serve.

Friday, March 15, 2013

Mushroom & Red Wine Sauce


(about 4 servings)


Mushrooms are in season in Texas at the moment and on sale practically everywhere I've seen them. I grabbed a little over a pound to make this quick and easy sauce. Every time I make this, it's a bit different. You can swap out the rosemary for thyme or sage. You can add finely chopped shallots along with the garlic and lastly if you prefer something a bit richer then stir in a tablespoon or two of heavy cream right at the end taking care not to let the sauce come to a boil after you do so.

Regardless how you make it, the finished sauce is great with meat or poultry or over a bed of rice or pasta. Listed below are the ingredients for the way I made it this time. I used beef broth, but you can replace that with mushroom or vegetable broth for a vegetarian meal.

3 tbsp butter
2 garlic cloves, minced
1 1/4 lb mushrooms, cut up or sliced
1 tsp fresh rosemary, chopped
freshly cracked black pepper
1 cup dry red wine
1 cup beef, mushroom or vegetable broth
splash of wine
1 tbsp corn starch
salt, to taste

Melt the butter over medium heat in a large non-stick skillet. Add the garlic and fry for about 30 seconds.


Add the mushrooms and increase the heat slightly. Fry the mushrooms while stirring them until they begin to let go of their moisture. Stir in the rosemary and pepper.

Pour in the red wine and broth. Simmer the mushrooms briskly for about 6-10 minutes or until the liquid has reduced by about one third.


Combine the splash of wine with the cornstarch until the mixture is smooth. Stir in a few tablespoons of hot liquid from the mushrooms and then pour all of it back into the skillet. Stir until the sauce has thickened; about 1-2 minutes.

Check seasoning and add salt, if needed. Remove from heat.

Serve as a side with meat or poultry or over a bed of rice or pasta.


Sunday, July 15, 2012

Bolognese Sauce


(about 8 servings)


This bolognese spent the better part of the day on the stove top, simmering gently over very low heat. That gave the sauce a chance to really develop its flavours and was well worth the time.

Years ago I sampled a sauce similar to this which contained chicken liver. Sadly it's becoming more and more difficult to find them. Rather than having to special order the liver and put off making this until next weekend, I decided to add some liverwurst instead. That did the trick. The finished bolognese had a very subtle taste of liver which I loved.  If you gag at the thought of liver, then by all means leave it out. :p

1/4 lb prosciutto, chopped
2-3 cloves garlic, chopped
2 celery ribs, chopped
3 medium carrots, chopped
1 large yellow onion, chopped
8 oz mushrooms, chopped
1 tbsp olive oil
1 1/2 lb lean ground beef
1/4 lb coarse liverwurst (optional)
1 28 oz can diced tomatoes
2 tbsp double concentrated tomato paste
2 cups red wine
1 tsp unsweetened cocoa powder
1 tsp fresh rosemary, chopped
1/2 tsp dried thyme
1/2 tsp dried oregano
1/2 tsp dried marjoram
1/4 tsp freshly ground black pepper
salt, if needed

freshly cooked pasta
Parmigiano Reggiano


Place a dutch oven on top of the stove over a low flame. Add the prosciutto and garlic and stir time to time.

When the prosciutto begins to render some of its fat (if it's really lean, add a small amount of olive oil) add the celery, carrots, onion and mushrooms. Cover the pot and braise the vegetables and prosciutto over the lowest flame possible for about 2-3 hrs.


Remove the lid and increase the heat slightly. The mixture will have accumulated some liquid. Stirring from time to time, cook the mixture.. some of that liquid will evaporate, which is fine.

Meanwhile add the olive oil to a skillet and set over medium-high heat. Brown the ground beef, breaking the meat up with a wooden spoon as you go along.

I tried to lightly brown the vegetable mixture at this point, but it was beginning to stick to my dutch oven and rather than adding more oil or taking the chance it might burn, I added the liverwurst, diced tomatoes, tomato paste and red wine and stirred everything until it was well combined.


Drain the meat, if necessary and add that to the dutch oven along with the cocoa powder, rosemary, thyme, oregano, marjoram and black pepper. I didn't add any salt at this time preferring to wait a few hours to see how salty the mixture was after the prosciutto had a chance to fully mingle.

Cover the pot once again and adjust the heat to it's lowest setting. Simmer very gently for another 3-4 hours.

Check and add salt at this point if it's needed. Serve with cooked pasta. Sprinkle with a bit of  Parmigiano Reggiano, if desired.  This sauce freezes really well.


Sunday, June 17, 2012

Roasted Red Pepper Coulis


(about 1 1/2 cups)


This delicious and flavourful sauce is quite simple to make and pairs well with a variety of dishes. It's wonderful with steamed vegetables such as cauliflower, fish and shellfish, poultry, roasted meat, even over cooked rice or noodles.

I like to keep mine simple adding just a small amount of olive oil, balsamic vinegar, salt and pepper. You can always add minced garlic, shallots, chives or parsley to yours, if you wish.

3 red bell peppers
2 tsp olive oil
1 tsp balsamic vinegar
salt and freshly ground pepper, to taste


Preheat oven to 450°F.

Wash the peppers. Cut in half and remove the seeds. Place the peppers skin side up onto a baking sheet lined with parchment paper or aluminum foil, keeping everything in one single layer.

Bake in the middle of the oven for about 20-30  minutes or until the tops are blistered. Remove from oven and cool.


Slip the blistered skins off the peppers and place them into the bowl of a food processor. I like to do this directly over the bowl to catch any juices that might be dripping. Add the olive oil, vinegar, salt and pepper and process until smooth.

Check and adjust the seasoning, if necessary.