Showing posts with label chocolate. Show all posts

Sunday, June 9, 2013

Intensely Chocolaty Fudgesicles

(6 -  1/2 cup ice pops)


A few weeks ago a neighbor gave me a set of popsicle molds. They were larger than what she expected and in the meantime she's managed to find some with a smaller capacity. These hold half a cup of liquid each.

I hadn't really thought much about making my own popsicles, but since getting this set I haven't been able to stop. There have been a few times I've had a new mixture ready to freeze before I even finished eating the previous batch! Up to now, these creamy fudgesicles by far have been my favorite. They are intensely chocolaty, so much better than anything you might hope to find at the store.

2 cups milk, I used 1%
1 tbsp cocoa powder, I used Hershey's Special Dark
1 tbsp corn starch
1/3 cup half & half
1 cup, plus 2 tbsp bittersweet or semisweet chocolate chips 

Pour the milk into a saucepan. Combine the cocoa powder and cornstarch in a small bowl and whisk in the half & half until you have a smooth lump free mixture. Whisk this into the milk and place the saucepan over a medium flame.

Bring the mixture to a simmer and keep stirring or whisking for about one minute. Remove the pot from the stove.


Whisk in the chocolate chips until they are completely melted. Pour the warm chocolate mixture into the molds. After they have cooled, put the handles in place. Freeze them until they are solid; at least 4 - 5 hours.

To serve, run each one carefully under hot water until you can wiggle the fudgesicle out of its mold.

Sunday, April 21, 2013

A Simple Frozen Banana Dessert


(2 servings)


A year or so ago I came across a posting about a single ingredient banana ice cream. I had forgotten about it until this weekend when I had a couple of very ripe bananas on my hands.

This is really simple if you have a food processor. It might work in a blender, but I haven't tried that. I made a chocolate coating for the ice cream and topped it with roughly chopped dry roasted cashews. Boy, was I amazed by how good this was! These bananas turned into the smoothest and creamiest ice cream ever. It was sweet enough and dairy free, and it really came down to just eating a banana or so.

If fat is an issue then don't bother with the chocolate coating or nuts. Bananas do contain a tiny amount of fat naturally. I looked it up, 1 g of fat in a 225 g serving.

banana ice cream
2-3 large very ripe bananas


chocolate coating
2 tbsp bittersweet or semisweet chocolate chips
1 tbsp virgin coconut oil (the kind for medium heat and solid in the jar)


4-5 dry roasted cashews, coarsely chopped

Peel the bananas and cut into slices. Place them inside a freezer bag and try to keep them in a single layer. Freeze overnight or until they are frozen solid.


Right before you remove the bananas from the freezer, make the chocolate coating.

Place the chocolate chips and coconut oil into a bowl. Set this over hot water or place it into the microwave and heat 10 seconds at a time until they begin to melt.


With either method, once most of the chocolate has melted about halfway or a bit more, remove it from the heat and continue to stir until the chocolate has completely melted. Set aside.


Remove the frozen bananas from the freezer and place the slices into the bowl of a food processor. Pulse until they break up and then continue to pulse until they form a ball.

Remove the top and scrape down the sides. Break up the ball and distribute it evenly around the bottom of the bowl. Replace the top and continue to pulse until the mixture is smooth and creamy.


Divide the ice cream between 2 bowls. Drizzle each with the chocolate coating (there's probably enough coating for 3 or 4 desserts; it hardens to a super thin shell the moment it hits the cold ice cream) and sprinkle each with the chopped nuts.

Enjoy.

Fast and Easy Paleo Recipes

Sunday, October 14, 2012

Quick Chocolate Mousse Adapted from Aneta's Recipe


(4 generous servings)


Years ago in Toronto, I was served an amazing chocolate mousse. It was rich, smooth and intensely chocolaty, laced with Grand Marnier. My friend Aneta, who made this delicious dessert confided it only took her about 5 minutes to make.

Later on Aneta showed me how she made it (in a blender) and since then whenever I make a chocolate mousse I make a version of what she taught me depending on what I have on hand. I've never had the slightest inclination to try anything else. I have used different chocolates, liqueurs and sweeteners and every time I've made this mousse, I have received nothing but compliments. People think I knocked myself out.

If you prefer to make a larger amount, then just double everything listed below. Everything will fit into a blender just fine, but might not fit as comfortably into a food processor unless you have one with a large capacity.

6 oz semi-sweet chocolate chips (half a 12oz bag) at room temperature
1-2 tbsp honey, to taste
1 *large egg at room temperature
1 *large egg yolk at room temperature
1/4 cup very hot espresso
1/4 cup hot milk (don't let it boil)
1-2 tbsp coffee liqueur

whipped cream and shaved chocolate, optional

In the bowl of a blender or food processor place the chocolate, honey, egg and egg yolk. Blend until the mixture begins to liquefy and the chocolate chips break down significantly.

Pour the hot espresso and milk down the chute with the motor running and leave it running for about 2 minutes. The bowl will feel warm to the touch and the chocolate chips will have completely melted.  Pour the coffee liqueur down the chute and continue running the motor for another 20 seconds or so.

My chocolate often has a chalky appearance because I like to keep it refrigerated here in Texas. It's fine for baking or for something such as this. The bottom left photo shows the chocolate, honey and egg mixture before the hot espresso and milk are added.

Pour the mousse (it will be runny like soup) into a serving dish or divide it between 4 small bowls or ramekins.

Refrigerate until the mousse firms up, about 3-4 hours.

Serve with whipped cream and shaved chocolate, if desired.

*If you have any concerns about using raw eggs for this recipe, then consider using pasteurized eggs. I didn't use pasteurized eggs for this, but very fresh organic eggs from a source I trust.

Sunday, April 8, 2012

Rose's Banana Cake with Chocolate Ganache


(8 inch cake)


Happy Easter!

The other day I was looking for a book and noticed Rose Levy Beranbaum's Cake Bible, which I hadn't looked through for quite some time. At one point it was my favourite cookbook which I took to bed with me each night, to read. Many people find her recipes frustrating and hate having to follow them in order for their cakes to turn out. Let's face it, we aren't making a stew here where an additional onion, potato or cup of wine make a huge difference. Baking a cake is more exacting if you expect a similar result each time.

That being said, Beranbaum's banana cake is a lot more forgiving than some of her other recipes. I rarely make it exactly the same way, yet it always turns out; a moist, buttery and flavourful cake. I have no patience for certain things, like sifting flour. I just pull out my kitchen scale and weigh out the amount I need. The Cake Bible provides both weights and measures for all recipes. For this recipe, I loosely recalculated the ingredients to make a smaller 8 inch cake.


Recently I have fallen in love with meringue-like frostings which are light and smooth. I tried making one for this banana cake, with browned butter which quickly turned into a soupy mess. I ended up rescuing that disaster with 4 oz of semi-sweet chocolate and 4 oz of unsweetened chocolate; just enough to create a spreadable frosting. The frosting was nice, but I probably should have made the tangy chocolate ganache in the first place.

Adapted from Rose Levy Barenbaum's Recipe for an 8 inch cake
1 1/2 large ripe bananas/3/4 cup/170 grams
1/4 cup sour cream/60 grams
1 large eggs
1 large egg yolk
2 tbsp canola oil
1 1/2 tsp lemon zest, minced/3 grams
1 1/2 tsp vanilla extract
1 1/2 cups sifted cake flour/ 150 grams
1/2 cup fine sugar/115 grams
3/4 tsp baking soda
3/4 tsp baking powder
1/4 tsp salt
6 tbsp unsalted butter, softened/3/4 stick/85 grams

Equipment: One 8-inch by 2-inch cake pan or 8-inch springform pan, greased, bottom lined with parchment or wax paper and then sprayed with Baker’s Joy or greased again and floured.

Preheat oven 350°F.

In a food processor process the banana and sour cream until smooth. Add the eggs, lemon zest, and vanilla and process briefly just to blend.

Using a hand mixer, combine the remaining dry ingredients and mix on low speed for 30 seconds to blend. Add the butter and half the banana mixture. Mix on low speed until the dry ingredients are moistened. Increase to high speed and beat for 1 1/2 minutes. Scrape down the sides.


Gradually add the remaining banana mixture in 2 batches, beating for 20 seconds after each addition to incorporate the ingredients. Scrape down the sides. Scrape the batter into the prepared pan and smooth the surface with a spatula. The pan will be about 1/2 full.

Bake *30 to 50 minutes or until a tester inserted near the center comes out clean and the cake springs back when pressed lightly in the center. The cake should start to shrink from the sides of the pan only after removal from the oven.

Let the cake cool in the pan on a rack for 10 minutes. Loosen the sides with a small metal spatula and unmold or remove the sides of the springform pan. Allow the cake to cool completely before wrapping airtight.

Finished Height: 2 inches to within 1 inch of the side; 1 1/2 inches at the side.

Store: Airtight: 2 days room temperature, 5 days refrigerated, 2 months frozen.

Serve: Room Temperature

*Although the original recipe calls for 30-40 minutes baking time for a 9 inch cake, I have always needed 40-50 minutes for an 8 inch cake in a convection oven.


I did not make this chocolate ganache, but if I were to make it for this cake, I would probably just make half this recipe.
Rose Levy Barenbaum's Sour Cream Ganache Frosting
4x 3oz semi-sweet chocolate bars(no higher than 62%)/340 grams
1 2/3 cup sour cream/400 grams

In a double boiler set over hot water or a microwave oven on high power, melt the chocolate, stirring every 20 seconds. Remove it from the heat source and stir in the sour cream until uniform in color. Use it right away or store it in a tightly covered bowl. When ready to frost the cake, soften it if necessary in a water bath or microwave for a few seconds, stirring gently.

Sunday, January 22, 2012

Canada Cornstarch Shortbread with Chocolate

Pin It
(about 16 cookies)


The very first time I made shortbread it was from a recipe off the back of a Canada Cornstarch Box. This is one of the best recipes I have ever come across. It produces a rich, buttery shortbread which melts in your mouth.

Occasionally, I'll wrap the shortbread around pieces of chocolate for a delightful, but decadent treat.

adapted from Canada Cornstarch
1/2 cup cornstarch
1/2 cup icing sugar
1/8 tsp fine sea salt
3/4 cup unbleached flour
1/4 cup whole wheat pastry flour
3/4 cup unsalted butter (1 1/2sticks), cut up
2 tsp vanilla extract
4 oz baking chocolate bar, broken into 16 pieces*


Place the cornstarch, icing sugar, salt and flour into the bowl of a food processor and pulse a few times to combine.  Add the butter and sprinkle the vanilla extract evenly over the top. Run the motor until a soft dough begins to form.


Preheat oven to 300°F.


Divide the dough into 16 equal pieces. Encase a piece of chocolate inside each piece of dough.


Place the cookies about an inch (or more) apart of an ungreased cookie sheet. Come hell or high water, I was determined to get all of these cookies onto my small baking sheet for my counter top oven. This shortbread will spread a bit as you can see from my photo. Bake for about 25-35  minutes or until the edges begin to brown.


Remove from oven and cool on baking sheet for a minute or two, then remove shortbread onto a wire rack.

*I have always used baking chocolate for this, so I have no idea how regular chocolate might behave, but I would probably give that a try if that's all I had on hand. I like using milk chocolate for this, but all I had was bittersweet which turned out rather nice.

Sunday, December 18, 2011

Rum Balls

(28-32 rum balls)


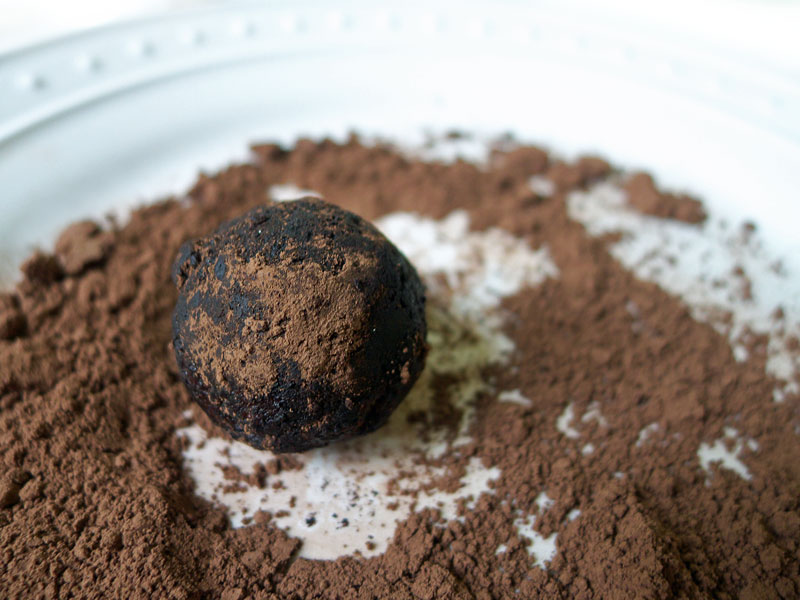
Rum balls are pretty easy to make, and one of those things I associate with Christmas. I use whatever I happen to have on hand. It can be day old cake, cookies...  various nuts, such as pecans, walnuts, coconut or hazelnuts.. cocoa powder or chocolate.. bourbon, if you don't care for rum. The rum and melted butter binds everything together, and those amounts can vary depending on the moisture content of the cake or cookie crumbs. I rarely add sugar because the mixture usually already seems sweet enough to me. If I were to add any, I would probably use icing sugar for these.

Saturday, May 21, 2011

Chocolate Gelato

(about 1 quart)


I have been consumed with making gelato all week. I barely finish making one when I'm already thinking about the next.

This chocolate gelato was amazing; rich tasting with a nice smooth texture. I decided to use orange liqueur for this. If you prefer to make yours free of alcohol, then add 2 raw egg whites instead.

2 1/2 cups milk
1/2 cup heavy cream
1/4 cup dark cocoa (I used Hershey's Special Dark)
3 tbsp corn starch
1 cup semi sweet chocolate chips
1/3 cup liqueur or brandy (I used Gran Marnier)

Pour the milk into a saucepan.

Whisk the cocoa and cornstarch into the cream until smooth and add to the milk. Turn on the heat and bring the mixture to a boil. Continue boiling for one minute, whisking the chocolate mixture the entire time.

Remove from heat and add the chocolate chips. Whisk until the chocolate has melted. Set aside to cool. Place into the refrigerator for at least 5 hours or overnight.

Stir in the liqueur and process according to your ice cream manufacturer's directions.

Thursday, April 28, 2011

An Easy Chocolate Cake

 (one 8" cake)


A number of years ago a friend gave me this recipe. She referred to it as a "flourless" chocolate cake, which it isn't, as it does contain one tablespoon of the stuff. She couldn't remember exactly where she had gotten the recipe, but seemed to think it might have come from the New York Times.

In any case it's a very easy cake to make, so easy, I have never written down the ingredients until now. One pound of chocolate, 1 stick of butter, 4 large eggs, 1 tablespoon each of sugar and flour.

You can use semisweet chocolate if you prefer. I used bittersweet chocolate for both cake and frosting this time because I served it with a caramel sauce which was a tad on the sweet side.

It's dense, rich  and very chocolatey; an 8" cake is plenty  for 10 - 12 people.

Sunday, March 21, 2010

Flourless Chocolate Chip Cookies with Pecans

(about 6-8 cookies)


I woke up to a very cold house this morning and wondered what was up with the temperature. Its nearing the end of March and often I'm already running the air conditioner. Well, I looked out of the window and there was snow on the ground; in Dallas of all places.

This seems to have been an unusual year. Last month around President's Day we had snow which remained on the ground for several days as well. Brings back memories of Canada.

Cold days seem nice for baking, so I made a batch of these cookies to have with my coffee this morning. I wasn't thinking and used white chocolate chips which are too sweet for this. In retrospect, I should have used semi or bittersweet chocolate chips.


1 1/3 cups icing sugar
1/2 cup cocoa powder, I used Hershey's unsweetened natural
1/2 cup semisweet or bittersweet chocolate chips
1/2 cup pecans, lightly toasted and broken up
2 large egg whites, slightly beaten

Preheat oven to 325°F.

Combine the icing sugar, cocoa powder, chocolate chips and pecans in a large bowl. When the dry ingredients are well combined, stir in the egg whites just until everything is evenly moist.

Drop by the heaping tablespoonful onto parchment or Spilat lined cookie sheets (those French baking mats).

Bake for about 16-18 minutes or until the tops are slightly cracked. I err on the side of slightly under-baked as I like them somewhat chewy. Allow to cool before removing from the cookie sheets.

I make these in small batches because they seem best the day they are made or perhaps one day later.